Welcome to AVCLabs Video Blur AI User Guide
Welcome to AVCLabs Video Blur AI - the ultimate video blur app powered by AI. With its cutting-edge auto-detection technology, this app can automatically blur videos, faces, backgrounds, and license plates with remarkable accuracy — and even remove unwanted objects from videos frame by frame. Get ready to dive into the world of video editing as we guide you on how to effortlessly use AVCLabs Video Blur. Let's take the first step.
Before you begin
Prepare your video footage: Get your video ready to apply the impressive blur effect with AVCLabs Video Blur AI. It supports a wide range of input formats, including 3G2, 3GP, AVI, DIVX, FLV, F4V, M2TS, MTS, MOV, MP4, M4V, MPEG, MPG, DAT, MKV, OGM, RMVB, RM, TS, TP, VOB, WMV, WTV, ASF, DV, and WEBM.
Check the system and hardware requirements: To run AVCLabs Video Blur AI, ensure that your computer meets the minimum technical specifications provided below. For an optimal experience, we highly recommend using the recommended system specifications, guaranteeing top-notch performance.
The minimum OS requirements for AVCLabs Video Blur AI will be:
Windows 10 (64-bit), and 11 (with dedicated GPU, NVIDIA GTX 1060 or above).
macOS 12 and above.
For more information, view the system and hardware requirements.
Tutorial: How to Use AVCLabs Video Blur AI
Download and Install
Download and run the installation package of AVCLabs Video Blur AI. After installation, the program will download some necessary components according to your system.

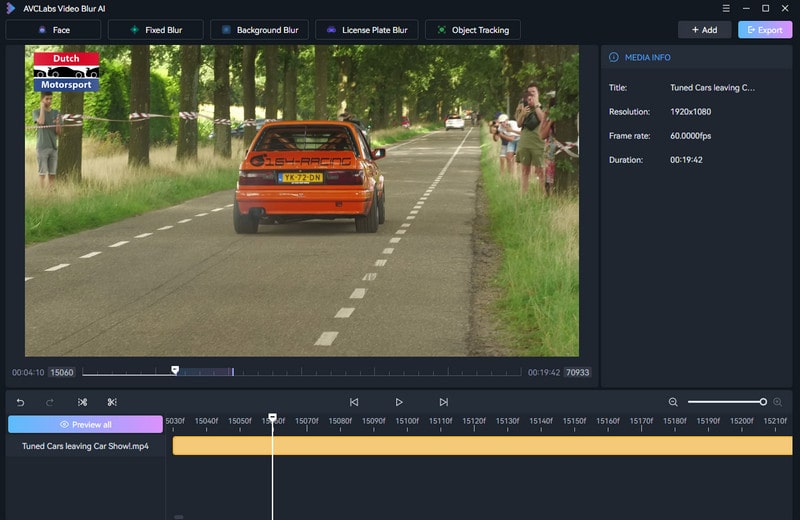
Import Video
Click the "Drop Video File or Click to Open" button or drag and drop to import a video. The video edit toolbar provides a trimming tool to trim off the beginning and the end of the video if you don't need them.
Click the "Complete timeline" button in the lower right corner above the timeline to display the complete timeline so as to visually check the position of the added effects.
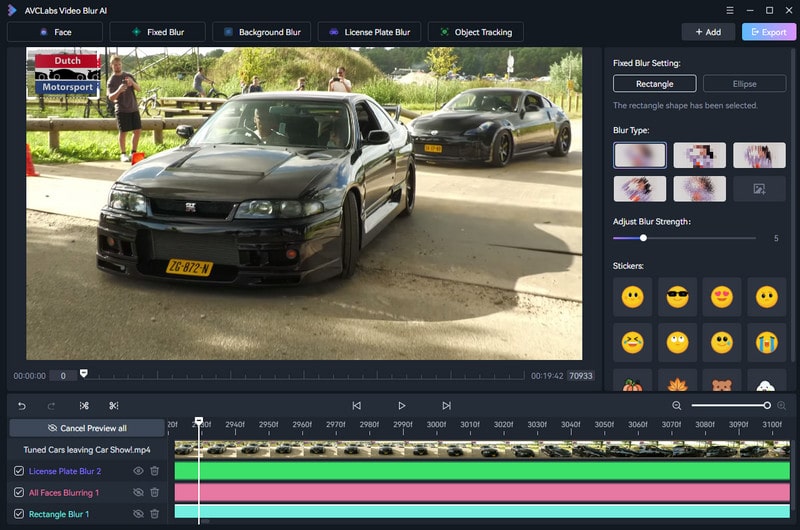
Add Blur Tasks
AVCLabs Video Blur AI has an array of powerful blur features, including Face Blur, Fixed Blur, Background Blur, License Plate Blur, and Object Tracking.

To start the blurring project, simply click on the top of the program to select one or multiple blur features.
Edit the Blur Task (Setting)
Once you add blur tasks, you can start editing each blur task.
1. Trim
To conveniently edit the blur task, simply right-click the timeline panel at the bottom.

Delete: Delete current blurring task.
Set as the start frame: Drag the playhead to move through the frames of a sequence to select a start point. Afterward, right-click on the timeline panel and select the option "Set as the start frame".
Set as the end frame: Drag the playhead to select a end point, then right click the timeline panel and select "Set as the end frame".
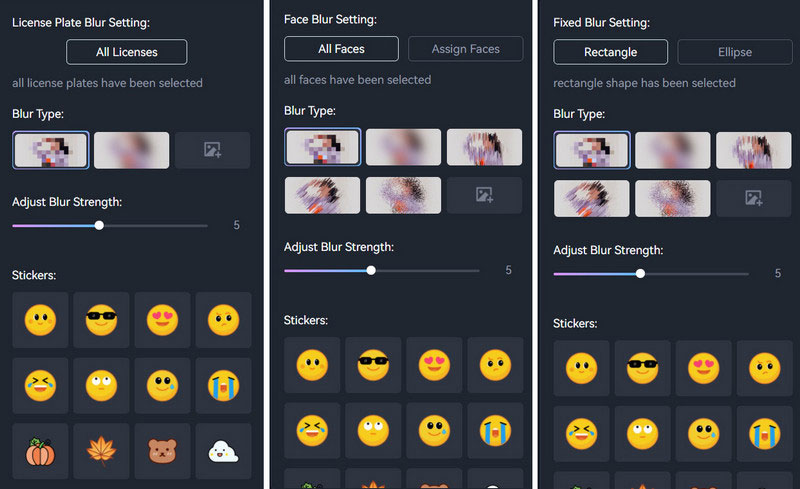
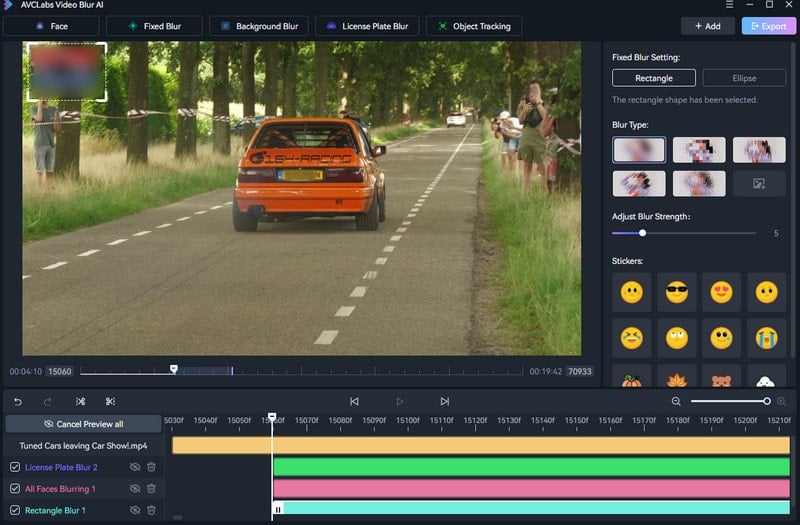
2. Select Blur Type
You have the option to choose from 5 different blur types - Mosaic, Standard Blur, Longitudinal Blur, Blique Blur, and Particle Blur. Alternatively, you can also upload a custom image from your desktop.
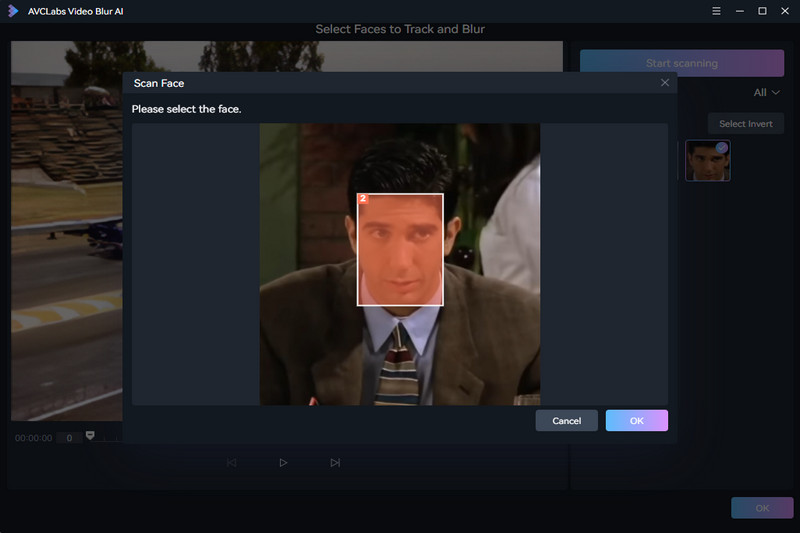
Import Image to Blur Face: In "Custom Selection" mode, you can also import a local photo to help blur faces. Just upload an image on the left panel. Click to confirm after detection. You can choose to blur the matched face or invert the selection to blur others.
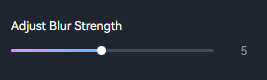
3. Adjust Blur Strength
Adjust the blur strength by dragging the slider: slide to the right to increase the strength, and to the left to decrease it.
4. Adjust Mosaic Settings
Change the color of the mosaic using a built-in color picker, and fine-tune the brightness, saturation, contrast, and transparency of the mosaic overlay.
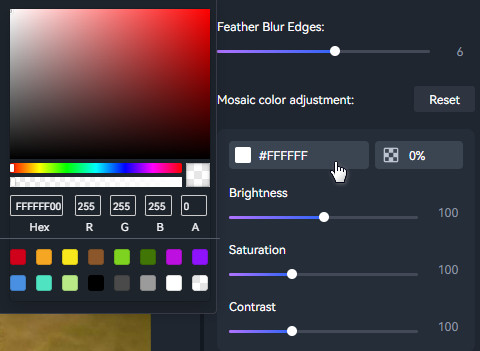
Change Mosaic Color: You can customize the mosaic color in three easy ways: select from the built-in color palette, enter a HEX color code (like #FF5733), or use RGBA values for more precise control.
Basic Settings: Simply drag the sliders to fine-tune Brightness, Saturation, and Contrast.
Reset: Click the "Reset" button above to restore the default settings.
5. Shortcut Key List (Windows & Mac)
| Shortcut | Function |
|---|---|
| K | Stop playback |
| L | Play |
| Space | Pause / Play |
| ← / → | Step forward / backward |
| I | Set task start |
| O | Set task end |
Add Object Removal Tasks
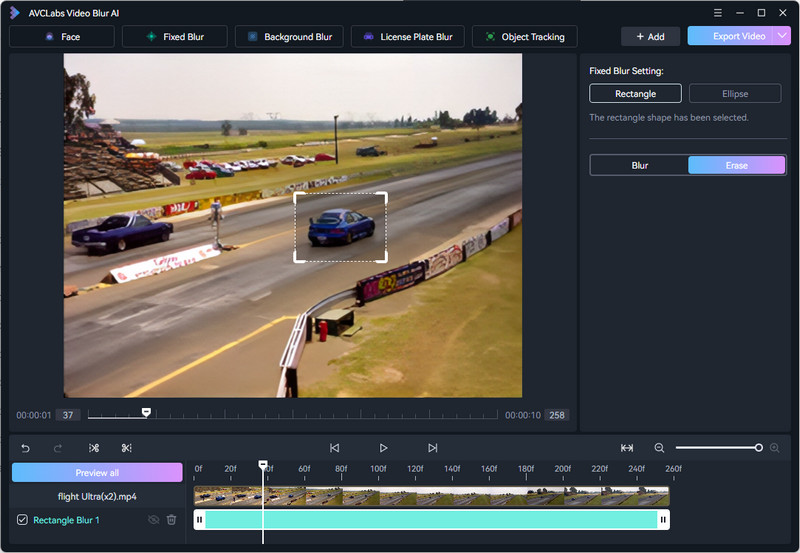
AVCLabs Video Blur AI has 2 video object removal modes - Fixed Removal and Object Tracking Removal. They are located in the Fixed Blur and Object Tracking panels respectively on the top of the program.
To start a project, simply click on one of the panels. If both removal modes need to be added, or multiple objects need to be removed, simply add them one after the other.

Edit Object Removal Task (Setting)
1. Select Removal Type
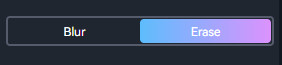
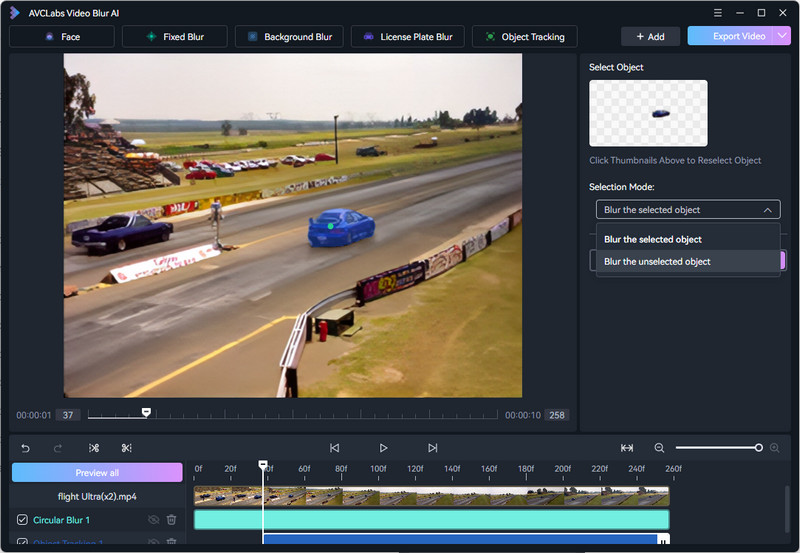
You have 2 options to remove obejcts from video in Fixed Blur and Object Tracking panels. Then, switch "Blur" to "Erase" mode on the right.
2. Modify Mask Position
Fixed Removal: Switch the pop-up mask between Rectangle and Ellipse, and move it to cover the object you want to remove.
Object Tracking Removal: Use the mouse to expand or subtract the selection area once the AI analysis is finished.
You can reverse the removal effect to add in the unselection area by changing Selection Mode on the right.
Preview Mode
When you add a blur or removal task, the program will automatically enter preview mode, allowing you to instantly see the effect applied to your video. To exit preview mode, click the "Cancel Preview All" button. You can also click the Eye icon next to each blur or removal task to preview its effect individually.
Start Export
If you are pleased with the applied blur effect, simply click the "Export Video" button located at the top right corner to start the export process for your video blur project.
To save time on future projects, click the "Export Mask" button to save this blur removal setup as a reusable template.
