[Ultimate Guide] How to Make A Video Clearer
"How can you make a dark video brighter and clearer?"
Making a video clearer can be a challenging task, especially if you’re working with low-resolution footage. But with the right tools like AVCLabs Video Enhancer AI, techniques, and tricks, you can significantly improve the clarity of your videos. This ultimate guide to making a video clearer breaks down the basics of video clarity and provides you with the best tips, tricks, and tools for creating clear, professional-looking videos. From the basics of color correction to advanced techniques such as noise reduction and stabilization, this guide makes it easy for anyone to take their video clarity to the next level by making a blurry video clear on iPhone, Android, Mac, Windows PC or online for free. Let’s get started!

Part 1: What Is Video Clarity
Video clarity refers to the level of detail in a video. It is a combination of several factors, including color, brightness, resolution, and motion. Ultimately, a video’s clarity is determined by how easy it is for a viewer to understand what is happening in the video. Achieving optimal video clarity begins with understanding how each factor impacts the overall clarity of your video and then working to improve the areas that need it most. Luckily, there are a number of simple techniques and tools such as AVCLabs Video Enhancer AI you can use to improve video clarity.
Part 2: Advanced Techniques for Video Claritye
Noise Reduction and Removal: If a video is shot indoors, it will likely be plagued with a lot of visual noise, like grain and image “noise” caused by poor lighting, low resolution, or both. Fortunately, noise reduction allows us to clean up this noisy footage and make it look clean and clear. You can use noise reduction in two ways: Reduce Noise and Remove Noise: Reduce noise is the simplest method of noise reduction. It simply lightens up the video or the part of the video that is too noisy. It works well for improving the clarity of indoor footage with a few scattered areas of grain. Remove noise is a more advanced noise reduction method that allows you to select and remove specific areas of noise from your video. This method is best for outdoor footage that is too noisy. However, it’s also ideal for indoor footage with a lot of grain.
Stabilization: If you shot your video handheld, it will likely have some level of shakiness to it. And while this can be acceptable for a quick selfie video on Instagram, it is not ideal for professional video production. Fortunately, stabilization is a simple technique for eliminating handheld shakiness. It works by finding the shakiness in your footage, then matching the movement to create a more stable video. This allows you to produce a video that is clearer and more professional-looking. There are two methods of stabilization: Visual Stabilization and Post Stabilization: Visual stabilization works in real time and allows you to stabilize your video as you shoot it. It is ideal for short videos that require little editing. Post stabilization is a more advanced technique that works after you’ve completed editing your video. It allows you to stabilize your footage through a variety of computer programs.
Deinterlacing: Deinterlacing is ideal for older video footage that has been digitized via an analog VCR. It works by converting interlaced video into progressive video. Interlace video is a video that is divided into two fields, one for each eye. It is ideal for slower internet connections, but it leaves interlaced video looking blurry and pixelated. Deinterlacing converts the video into progressive video, which eliminates the pixelated look and smooths out the video. This makes the video clearer and watchable for modern internet speeds. There are two methods of deinterlacing: Manual Deinterlacing and Automatic Deinterlacing: Manual deinterlacing is ideal for older video footage that is already digitized. You can use manual deinterlacing to convert old interlace video into progressive video. Automatic deinterlacing is ideal for video that has just been filmed. It works by converting new interlace video into progressive video.
Part 3: How to Make A Video Clearer on Mac/PC via AI
Making videos clearer has never been easier! Thanks to the wonders of technology, you can use AVCLabs Video Enhancer AI, which is available for both Mac and PC users. This powerful enhancer uses advanced algorithms to make your video footage sharper and less pixelated. With just a few clicks of a button, you can take any blurry video and turn it into high-definition quality. Make sure you never miss another memory again with AVCLabs Video Enhancer AI!
Key Features of AVCLabs Video Enhancer AI
- Upscale low-res videos to 1080p, 4K, and 8K
- Remove video noise and restore facial details
- Colorize B&W videos to bring them to life
- Blur all unwanted parts to protect privacy
- Stabilize footage by removing camera shake
Steps to Make A Video Clearer with AI
Step 1: Download and Install AVCLabs Video Enhancer AI
Firstly, download and install the program to your Windows PC or Mac computer for an optimized experience.
Tips: For improved efficiency and processing time, we recommend using high-end dedicated graphics cards such as NVIDIA GTX 1050 Ti. Simply learn more about which system requirements are needed on our Tech Spec page.
Step 2: Open the Program and Add the Blurry Videos
Open the program and begin bringing life back into blurry clips.
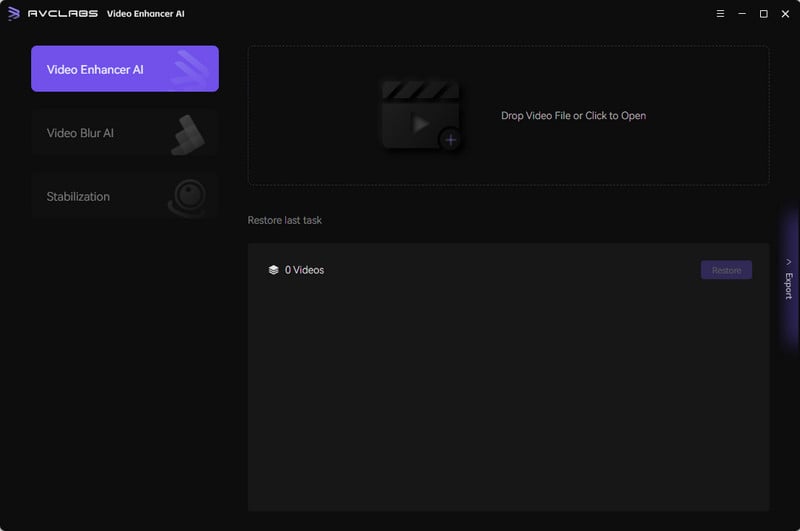
With intuitive drag-and-drop capabilities or a simple click of the Browse button, importing source files has never been so easy. Get ready to witness stunning results with this powerful video unblurring tool today!

Step 3: Select Targeted AI Features
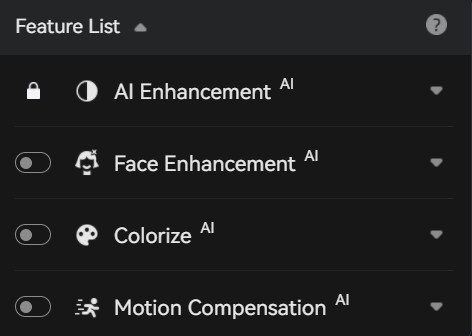
With AVCLabs Video Enhancer AI, you can easily enhance your video quality. On the right panel, select an AI model that meets your specific requirements and then choose a resolution for the best end result. There are four different AI features that can meet most of your demands. You can improve video quality with more than one feature at the same time, for example, upscale videos to 4k and colorize them.
Note: Keep in mind that higher resolutions aren't always ideal so consider what will work best with how you plan to use it!
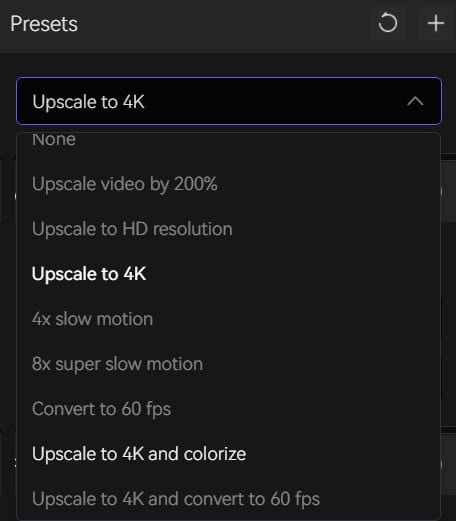
What's more, you can also select from the Presets section. It offers seven pre-configured options that you can use directly.
Step 4: Configure Settings
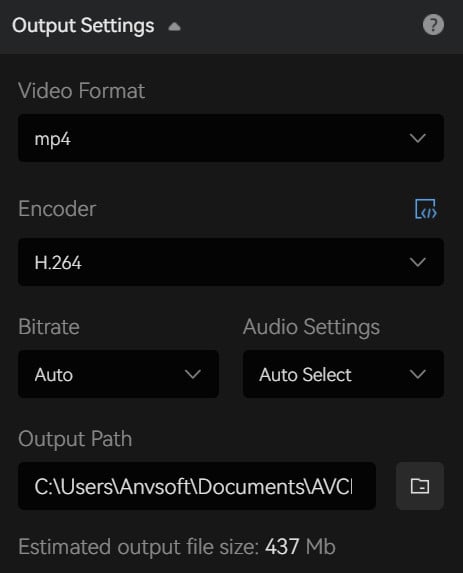
Output Settings: you can set the output video format(MKV, MP4, AVI, MOV, WEBM), the encoder (H.264, H.265, VP9 Good, VP9 Best, AV1), the bitrate, audio settings, as well as the output path as you wish.
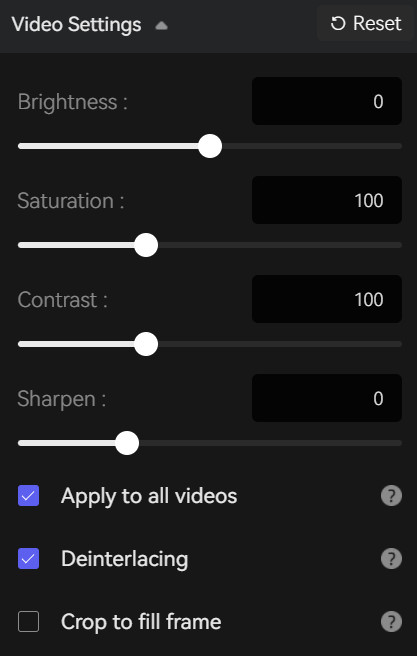
Video Settings: If you need more hands-on control, you can manually adjust the brightness, saturation, and contrast of your videos to enhance the visual quality under Video Settings. Or you can also check the box of cropping to fill the frame and deinterlacing.
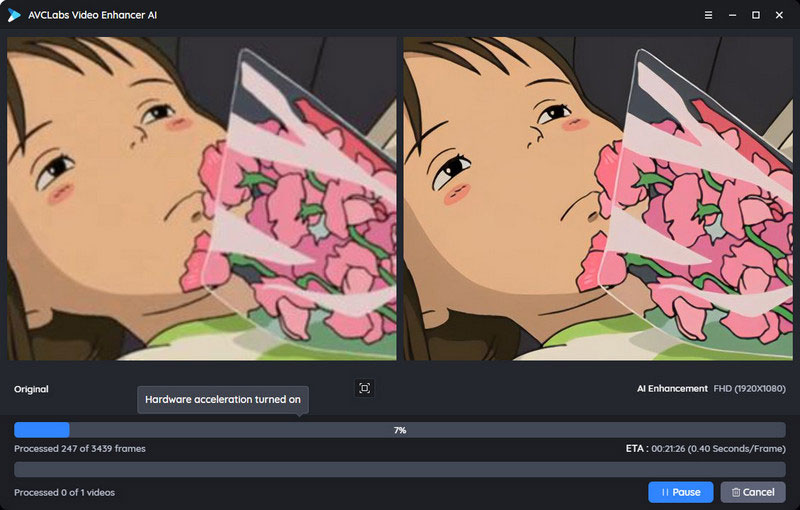
Step 5: Start Unblurring Videos with AI
After configuring all settings, click on the Export button to begin. Artificial intelligence works its magic behind-the-scenes, at the processing interface, you'll be able to preview both original and processed video with a progress bar, GPU use rate, and estimated time of completion.
When the video unblurring process is completed, just feel free to open the output folder for viewing of upscaled resolution of deblurred videos, it's simple!
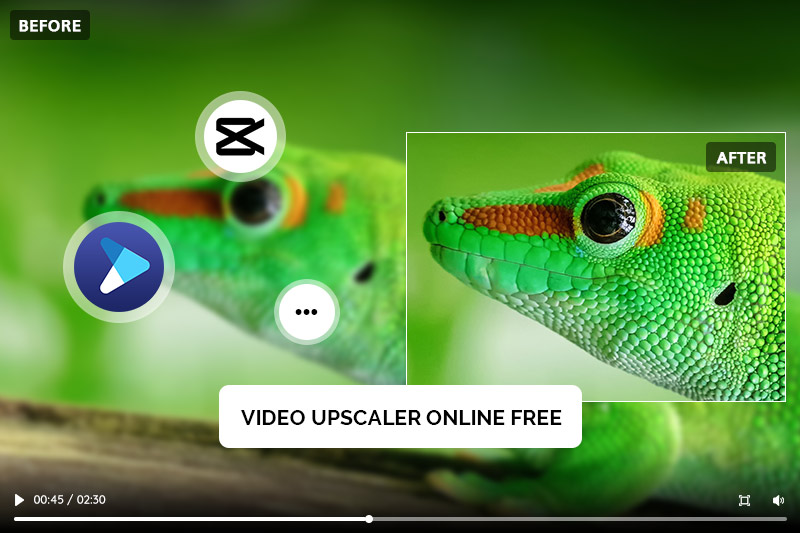
Part 4: How to Make A Video Clearer Online for Free
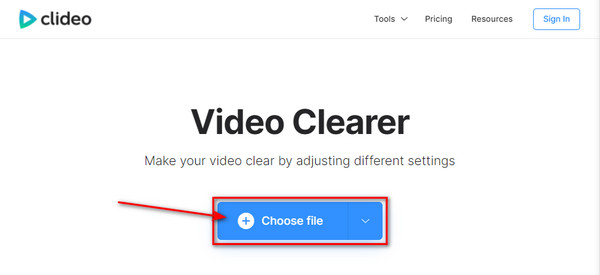
Making a video clearer online for free is a great way to improve the quality of your videos without shelling out extra money. There are plenty of free tools available that provide excellent video enhancing capabilities such as noise reduction, sharpening, and resolution adjustments. Clideo Video Clearer is such a great tool for users to make blurry videos clear and sharper.
Steps to Make A Video Clearer Online for Free
1. Just head to Clideo's Video Clearer online tool, and then upload the blurry clip you want to sharpen.
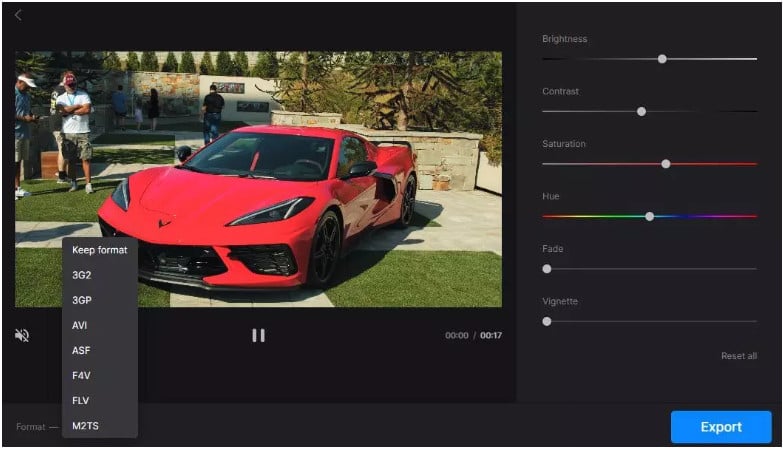
2. Tweak settings such as brightness and contrast to get a clear image.
3. Select an output format you prefer.
4. Preview it once you're done editing and click download to save it on your device.
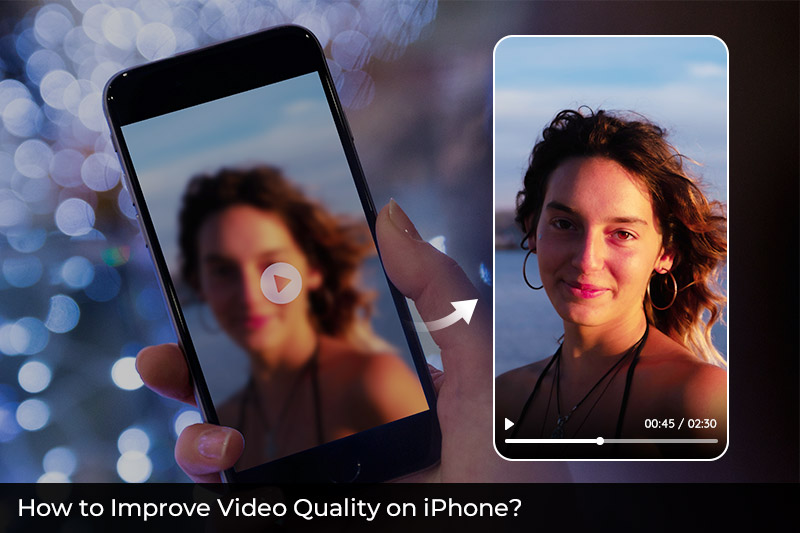
Part 5: How to Make A Video Clearer on Android or iPhone
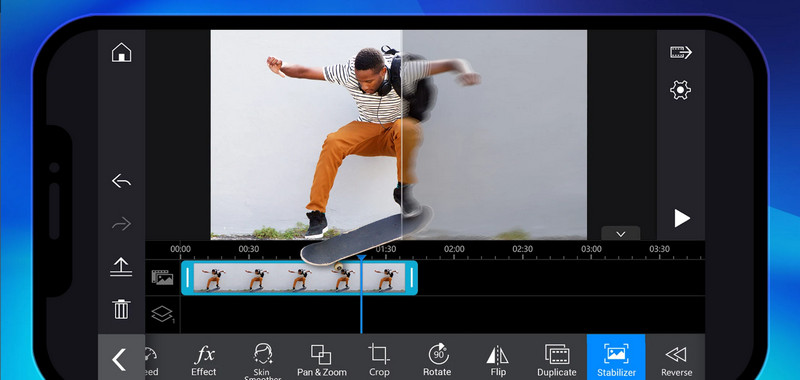
Making a video clearer on your Android or iPhone device is easier than ever with PowerDirector. This mobile and tablet application allows you to enhance the quality of your videos quickly and conveniently. With PowerDirector, you can adjust the brightness and sharpness, remove noise and grain, add helpful filters, and adjust the speed of video snippets. You also have access to quick actions and batch editing to quickly increase the clarity of multiple videos at once. Make sure that your video stands out from the rest with PowerDirector's features for clearer Android or iPhone videos!
Steps to Make A Video Clearer on Android and iPhone
1. Download and install the app to get started on Android or iPhone, then create a project name in accordance with the desired aspect ratio.
2. Once you've imported your file, click Edit icon followed by Stabilizer for pinpoint accuracy when correcting any blurry areas from past footage.
3. After adjustments have been made and finalized, export it directly onto your gallery or share it immediately across social media!
Part 6: Tips for Creating A Clear Video
Make sure you have the right equipment: It can be tempting to just jump right in and start filming once you have all of your ideas in place. However, before you do, make sure you have all the right equipment. In particular, you want to make sure your lighting is sufficient and that you have a decent camera that shoots in HD or 4K resolution. Even a smartphone camera can be used in a pinch, as long as the lighting is good and the camera shoots in HD or 4K.
Set the right camera settings: Now that you have the right equipment, it’s time to start shooting. Before you do, make sure you set the right camera settings. In particular, make sure the camera is set to shoot in HD or 4K resolution. You also want to set the camera to shoot in manual mode, so you have full control over the settings.
Set the right audio settings: Now that you’ve set the right camera settings, it’s time to set the right audio settings. Make sure you are using a good microphone and that it is positioned in a way that minimizes background noise. You also want to make sure the microphone is set to manual mode and set to the highest possible volume.
Make sure you have the right editing software: Editing your video is just as important as the other steps listed above. With the right editing software, you can enhance your video and make it look clearer. Make sure you have the right editing software on hand prior to editing your video.
Conclusion
Making videos clearer for everyone is something that we all strive to do. Whether it’s for a work project or just to make our personal lives easier, clarity in video can be key. By following these simple tips and using the right equipment, you’ll be able to create clearer videos that are enjoyable to watch. Whether you’re an amateur or a professional, having clear footage can make all the difference when it comes to making videos. So next time you record something, don’t forget these helpful tips! With a little bit of practice, you'll be able to create video content that is both effective and visually appealing.