How to Restore Faces with Stable Diffusion
"How does restore faces work in Stable Diffusion?"
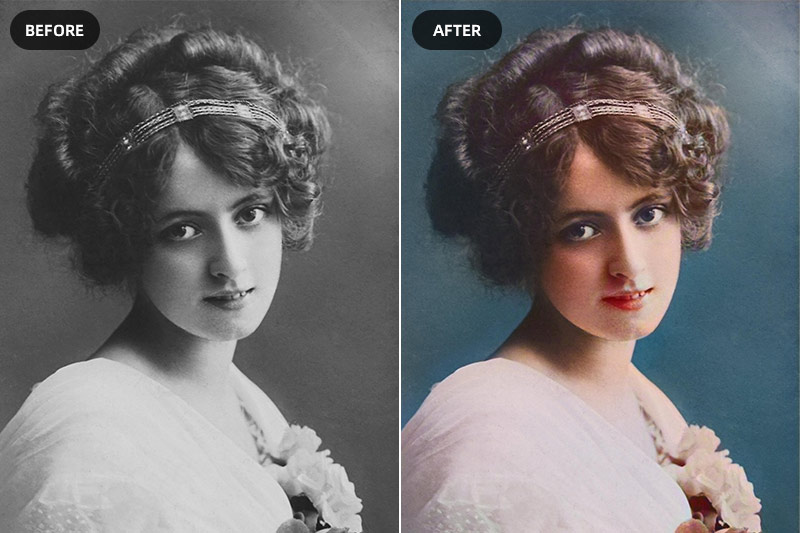
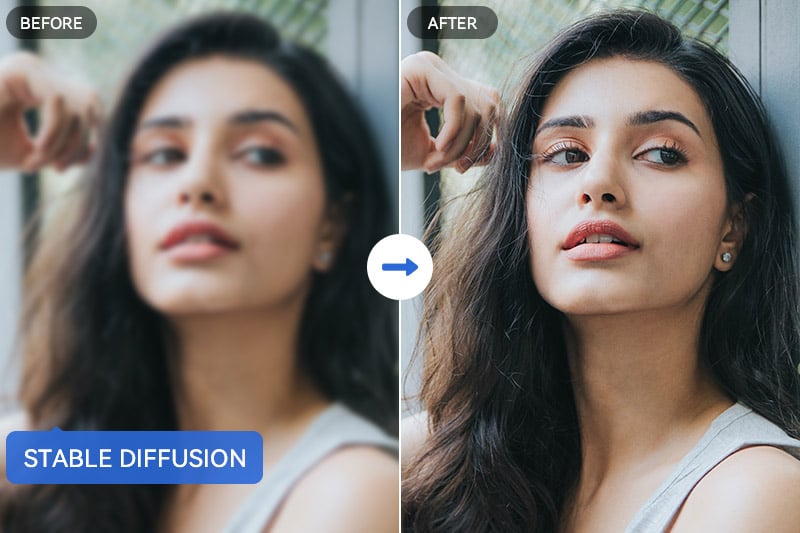
Facial image restoration is a crucial task in the field of computer vision and image processing. Whether it's enhancing old photographs, improving low-resolution images, or removing artifacts from facial images, the ability to restore faces is invaluable. In recent years, a powerful technique called Stable Diffusion has emerged as a promising solution for this task. Stable diffusion enables the restoration of faces that have been distorted or damaged by factors such as noise, blur, or aging effects. This article aims to provide you with a comprehensive step-by-step guide on how to restore faces using Stable Diffusion.
Part 1: Understanding Stable Diffusion
Stable diffusion refers to a set of algorithms and techniques used for image restoration. It involves the diffusion of information across an image to eliminate imperfections and restore the desired features. In the context of face restoration, stable diffusion algorithms offer several advantages. They can effectively address common challenges faced in the restoration process, such as noise reduction, deblurring, and enhancing facial details. The underlying principles and algorithms used in stable diffusion are designed to maintain stability while diffusing information, ensuring accurate and reliable restoration results.
Part 2: Challenges in Face Restoration
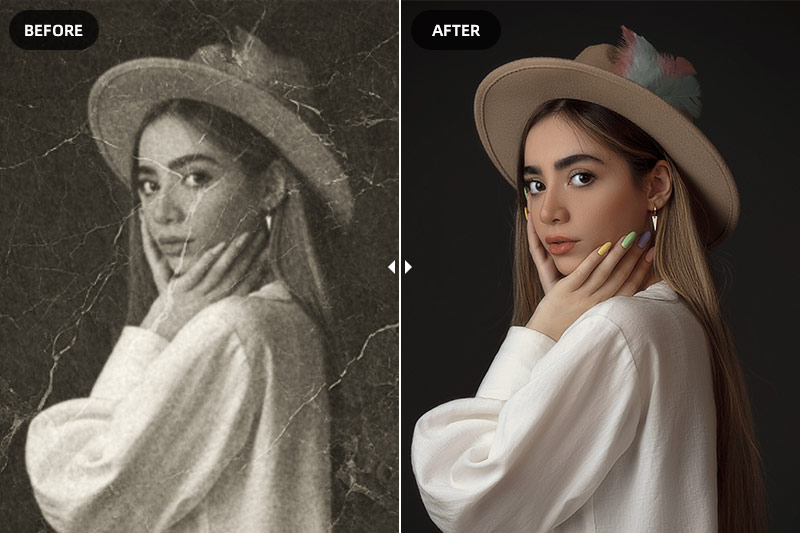
Face restoration presents unique challenges due to various factors that can affect facial characteristics. Noise, resulting from low light conditions or sensor limitations, can degrade the quality of facial details. Blur, caused by motion or focus issues, can lead to loss of sharpness and clarity in the image. Additionally, aging effects, such as wrinkles or changes in skin texture, can further complicate the restoration process. These challenges impact crucial aspects of face recognition and emotional expression, making accurate restoration essential for optimal results.
Part 3: Restore Faces with AUTOMATIC1111 stable-diffusion-webui
Follow the steps below to restore faces with AUTOMATIC1111 stable-diffusion-webui.
Some of the features of the stable-diffusion-webui include:
Inpainting: This feature provides the capability to seamlessly fill in missing or distorted portions of an image, such as eyes or mouth, improving its overall visual quality.
Color correction: This feature enables users to make precise adjustments to the image's color, resulting in a visually appealing and authentic appearance.
Image enhancement: This feature facilitates sharpening and overall quality improvement of the image.
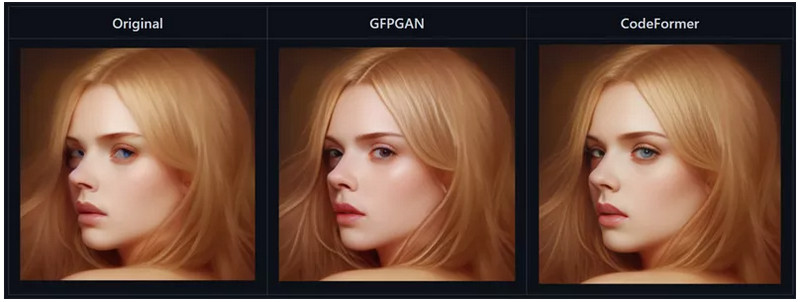
Face restoration: It lets users enhance facial features in images through the utilization of GFPGAN or CodeFormer techniques.
Steps to Restore Face via AUTOMATIC1111 Stable Diffusion Webui
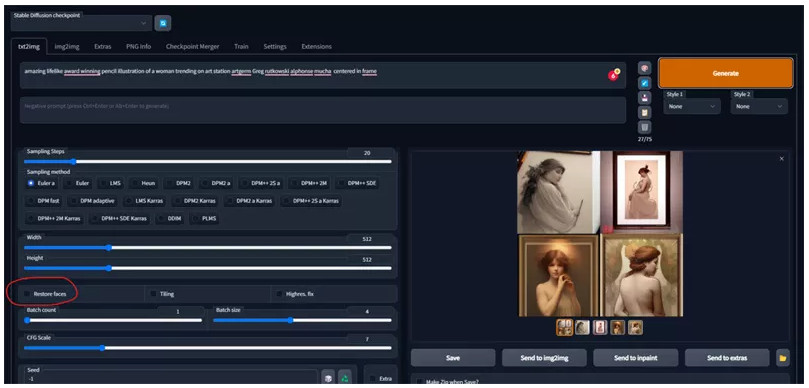
Step 1: After generating the new images, you should proceed to the tool's menu and then select the "Restore Faces" icon.
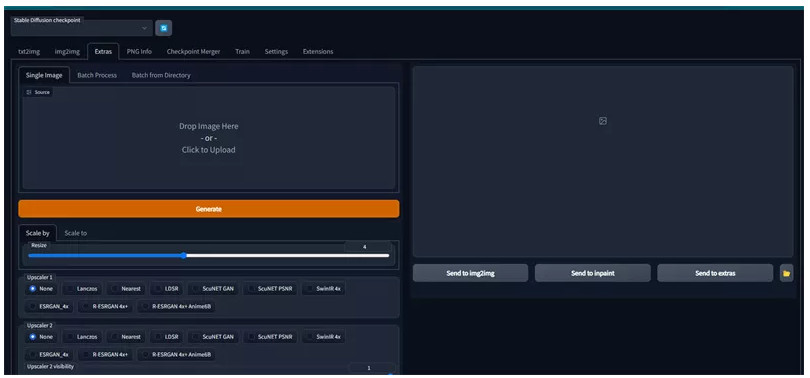
Step 2: To correct the eyes of an image, simply proceed to the "Extras tab" and then upload the photo in that section.
Step 3: Please ensure that you specify the impact (ranging from 0 to 1) of Code Former or GFPGAN. Different configurations may be necessary depending on the generated image.
Part 4: How to Restore Faces with Stable Diffusion Easily on Win/Mac/Online
In addition to utilizing the AUTOMATIC1111 stable diffusion webui, there are alternative methods to restore faces stable diffusion that you may consider.
4.1. Desktop Solution: Restore Faces with AVCLabs PhotoPro AI on Win/Mac
Several software solutions are available to facilitate the process of restoring faces with stable diffusion. One highly recommended desktop solution is AVCLabs PhotoPro AI, compatible with both Windows and Mac operating systems. It offers advanced face restoration capabilities, including stable diffusion algorithms, to help achieve optimal results.
Key Features of AVCLabs PhotoPro AI
- Clear up blurry photos with advanced technology
- Cutout image to make the background transparent
- Remove unwanted objects, people, watermarks
- Change the style of image to create unique look
- Colorize B&W photos to make it come to life again
- Upscale photos up to 3x, 4x without losing quality
- Automatically replace objects in photos with AI
Steps to Restore Faces with AVCLabs PhotoPro AI
Step 1: Download and Install AVCLabs PhotoPro AI
Download and install AVCLabs PhotoPro AI on your computer, then run it.
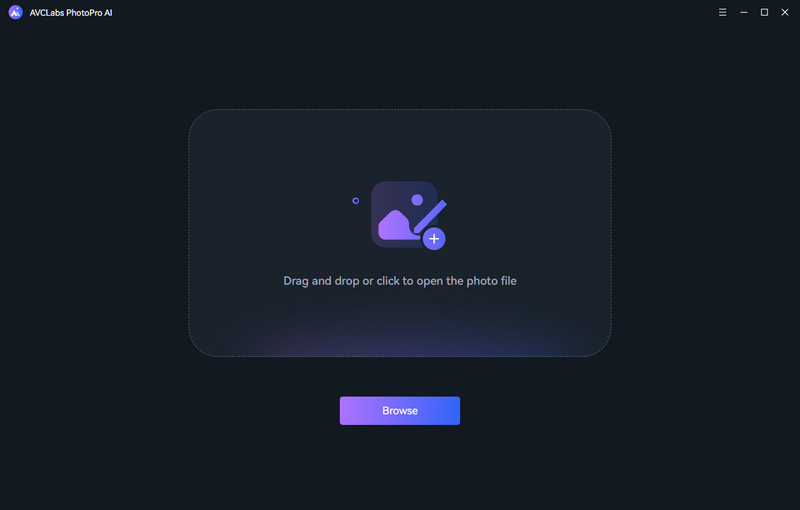
Step 2: Add A Photo with Blurry Faces
Click on the Browse button to add a photo with blurry faces to the program or drag and drop the blurry photo to it.
Currently supported formats: PNG, JPG, JPEG, BMP, RAW, etc.
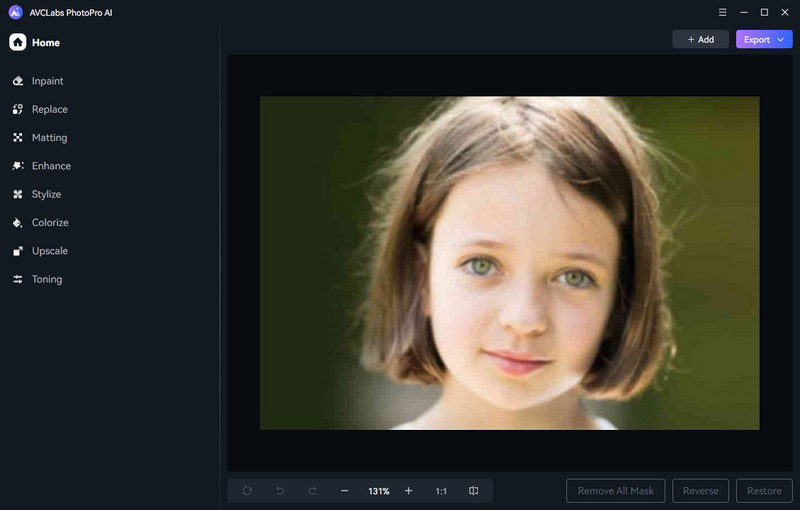
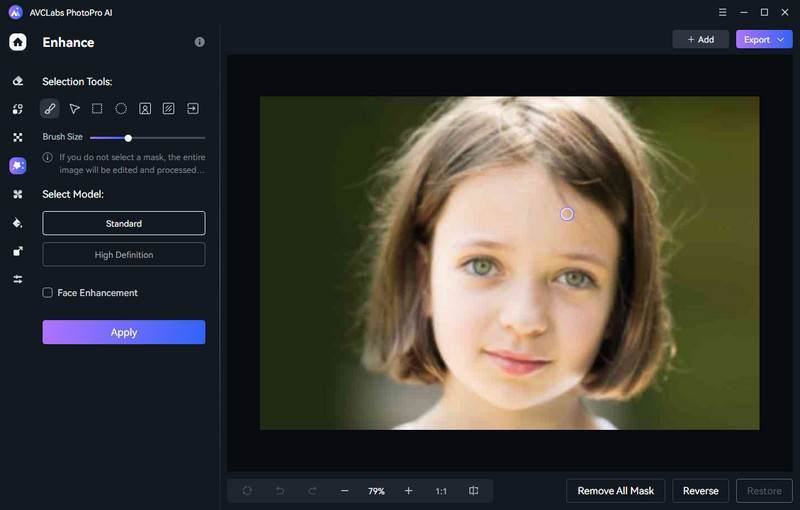
Step 3: Select the Enhance AI Model
Here, users need to select the Enhance model from the main interface's left menu bar and then choose the suitable enhance model. The Standard model, which is the default option, provides balanced improvements. Alternatively, users can opt for the High Definition model, which offers more pronounced enhancements, albeit with a longer processing time.
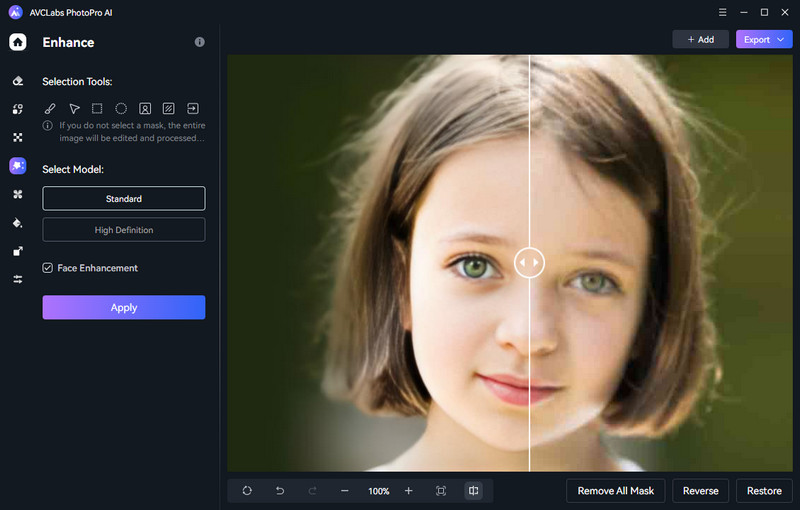
Furthermore, the Face Enhancement feature under this model can detect and recover details in blurry portrait photos, resulting in crisper and sharper results. Simply tick off the Face Enhancement option and hit the apply button to move on.
Step 4: Save the Photo with Faces Restored
After completing the face blur removal process, simply select the Contrast button to preview the original and sharpened photo simultaneously. If the unblurred photo satisfies your requirements, you can click the Export button to store the sharpened photo on your computer.
4.2. Online Solution: Restore Faces Online with AVC.AI
For those seeking an online solution, AVC.AI provides a user-friendly platform for face restoration using stable diffusion techniques. It simplifies the process and makes it accessible to users without the need for extensive technical knowledge.
Steps to Restore Faces Online with AVC.AI
Step 1: Visit AVC.AI and Upload Photos with Blurry Faces
To access your account on AVC.AI, please visit our website using your preferred web browser. Locate the Login/Sign Up option and click on it. Once logged in, you can upload blurry photos to AVC.AI by clicking on the Upload Image button or simply dragging and dropping one or multiple blurry photos onto the site.

Currently, supported input formats are *.png, *.jpg, *.jpeg, *.bmp, *.jfif, and *.webp.
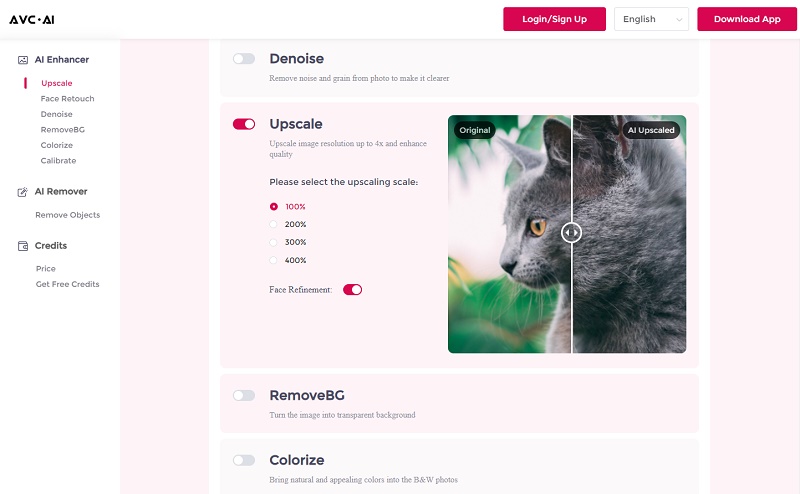
Step 2: Select the AI Model and Start Removing Face Blur from Photos Online
To eliminate facial blur in online photos, simply enable the Upscale option and deselect the Face Refinement feature. Subsequently, initiate the processing by clicking the Start Processing button to automatically apply the face unblurring algorithm.
Step 3: Preview and Download High-Quality Photos with Sharp Facial Features
After the face blur removal process is finished, you can click on the Eye icon to preview the unblurred photos with pristine facial details. Finally, simply select Download Image to save the clear photos.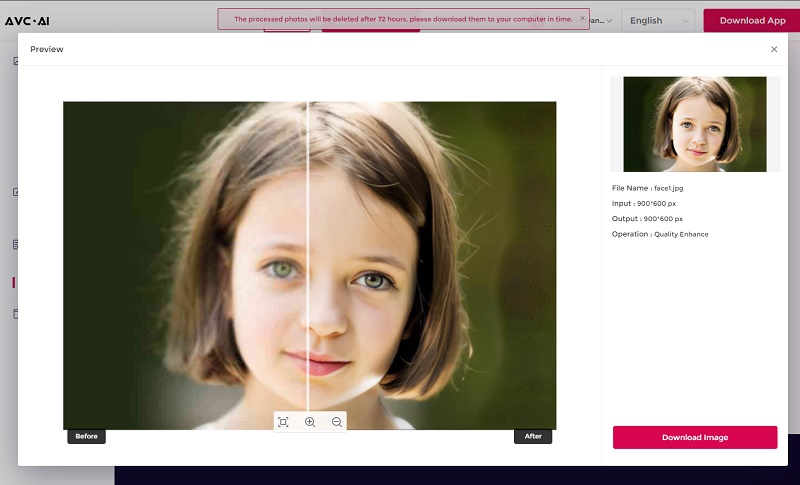
Conclusion
In conclusion, stable diffusion is an important mechanism for restoring complex images, and there are options available to suit different needs. Whether you are looking for a desktop solution to restore faces with AVCLabs PhotoPro AI on Windows or MacOS, or an online solution with AVC.AI, these solutions can help bring stability to your imaging projects. Ultimately, the choice of techniques and platforms comes down to convenience and preference, so make sure to assess your options carefully. Also remember that continuous experimentation is key in this field, and resilience is essential when it comes to any task related with image restoration. We hope this blog post was helpful in demystifying the process of face restoration using stable diffusion; now go forth and give it a try!