VHS Restoration: How to Repair Old Home Movies (Step-by-Step)
If you've got a box of old VHS tapes sitting in your garage or basement, you're not alone. Millions of American families have stacks of these relics from the 80s and 90s—birthday parties, Christmas mornings, little league games, graduations. The problem? Most VHS tapes have a shelf life of just 10 to 30 years. The magnetic particles that hold your footage are literally shedding off the tape.
The good news is you can still save them. I've gone through this process with dozens of my own family tapes, and I've learned exactly what works and what doesn't. Here's the step-by-step system I use for VHS restoration.
What You Need for VHS Restoration
Before you start, make sure you have everything on this list. Nothing's worse than getting halfway through and realizing you're missing a cable.
- A working VCR — Ideally a prosumer S-VHS deck with manual tracking control. The last new VCR was manufactured in 2016, so you'll be buying used. Test it thoroughly before you trust it with your tapes.
- A video capture device — A USB dongle that connects your VCR to your computer. Search for "VHS capture card" or "video converter." Popular options include Elgato Video Capture, Diamond VC500, and ClearClick Video2Digital.
- The right cables — RCA composite (yellow for video, red and white for audio). If your VCR has S-Video output, use that instead—it gives you cleaner color separation.
- Capture software — Often included with your capture device. OBS Studio is a solid free option. Paid choices like Movavi Video Editor or CyberLink PowerDirector also work well.
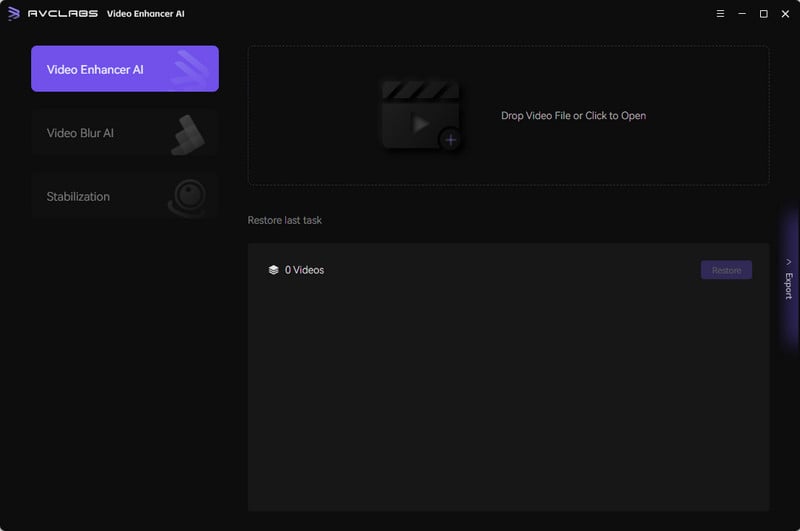
- AI enhancement software — For the final polish. AVCLabs Video Enhancer AI is the tool I use on family tapes. It has a free trial, so you can run a sample of your own footage before you buy.
Step 1. Inspect and Prepare Your VHS Tape
This is the step everyone skips—and the step where most damage happens. Don't just pop the tape in and hit play.
Start with a visual inspection. Look through the clear window on the cassette. See any white or black fuzzy growth on the tape pack? That's mold. Notice visible creases, wrinkles, or uneven edges? That's physical damage.
Test the reels by hand. Use a 1/8-inch hex wrench or a small screwdriver to gently turn the hub on the bottom of the cassette. If it spins freely, you're in good shape. If it's stuck or feels gritty, do not force it. Forcing a stuck tape will tear the magnetic layer and ruin it permanently. It can also gunk up your VCR's playback heads.
Know when to call a professional. Stop and send the tape to a restoration lab if:
- The tape layers are visibly stuck together
- You see mold spots covering more than a small area
- The tape feels tacky or sticky to the touch—this is sticky-shed syndrome, which requires controlled baking
- You don't have a working VCR and don't want to buy one
Professional VHS transfer services in the US often run about $20–$30 per tape, with discounts for bulk orders. Full restoration (cleaning, baking, repair) costs more. If you only have a handful of tapes, a shop transfer is often cheaper than buying all the gear and taking the risk yourself.
Once you've confirmed the tape is in good enough shape to play, move on to the next step.
Step 2. Convert VHS to Digital Video
This is where you make or break the entire project. Get this step right, and everything downstream works better. Get it wrong, and no amount of AI can fix it.
The signal chain is simple: VHS tape → VCR → capture device → computer.
Connect everything. Plug your VCR's outputs (RCA or S-Video) into your capture device's inputs, then plug the device into your computer's USB port. Install any necessary drivers and open your capture software.
Select the right input. In your software, choose the correct video source. You should see a live preview from your VCR—if not, double-check your connections.
Here's the critical rule: capture at native resolution. VHS is standard definition—about 480i on NTSC decks (typically captured at 720×480), or 576i / 720×576 on PAL. Capture the interlaced SD signal as-is. Do not upscale during capture. If you capture at 1080p or 4K, you're just multiplying file size and introducing interpolation artifacts that you can never undo. Upscaling comes later, and it should be done by AI—not your capture card.
Choose a high-quality codec. If your software supports it, capture to a lossless or near-lossless format. Uncompressed SD can run about 100–200 GB for a two-hour tape; a lossless codec is often smaller, but still large. I know that sounds excessive, but this is your digital master. Storage is cheap; lost quality is permanent.
Play the tape once, capture it once. Every playback physically wears the tape a little more. Make sure your settings are locked in, then record in a single pass. When it's done, store the tape safely and don't play it again.
At the end of this step, you have two things: your original tape (now safely archived) and a massive raw video file. That raw file is the foundation for everything that follows. The capture is the master if you want to restore video quality later with a better model.
Step 3. Fix Common VHS Problems
Now that you have your digital file, it's time to clean it up. You'll likely see some or all of these issues. Here's a quick reference for what they look like and how to fix them:
| Problem | What it looks like | How to fix it |
|---|---|---|
| Noise | Grainy, snowy picture with random flickering, especially in dark areas | Apply temporal denoising—this compares adjacent frames and removes noise while preserving detail. A good pass can cut a lot of snow without smearing motion. |
| Interlacing | "Comb teeth" or horizontal jagged edges on moving objects | Use a quality deinterlacer (QTGMC in AviSynth/VapourSynth, or Decomb/Yadif in HandBrake). Avoid simple blending—it cuts vertical resolution in half and creates ghosting. |
| Color fading | Washed-out, dull colors; skin tones that look green or purple | Color correction. Adjust saturation, contrast, and white balance. Some AI tools now handle this automatically with surprisingly good results. |
| Shaking | Jittery, unstable footage that makes you feel seasick | Stabilization. Many editors have built-in stabilizers. Stabilize after the snow is down so the tracker follows the room, not the speckle. |
| Blur | Soft, out-of-focus appearance with fuzzy edges | Light sharpening. Go easy—over-sharpening creates halos and an unnatural "plastic" look that's worse than the original blur. |
The order of operations matters. Always denoise before you upscale. Running AI upscaling on noisy footage forces the algorithm to treat noise as "detail" and enhance it too. The result is a blotchy, watercolor-like mess. Clean it first, then enlarge it.
Step 4. Enhance VHS Video with AI
This is where your footage goes from "watchable" to "impressive." But let's be clear about what AI can and cannot actually do.
What AI can do:
- Upscaling — Take your 480p footage to 1080p, 1440p, or even 4K
- Denoising — Remove grain and tape noise more intelligently than traditional filters
- Sharpening — Improve edge contrast without the harsh halos of a heavy unsharp mask
- Face/detail enhancement — Reconstruct facial features that have softened over time
- Color enhancement — Restore faded colors automatically, or even colorize black-and-white footage
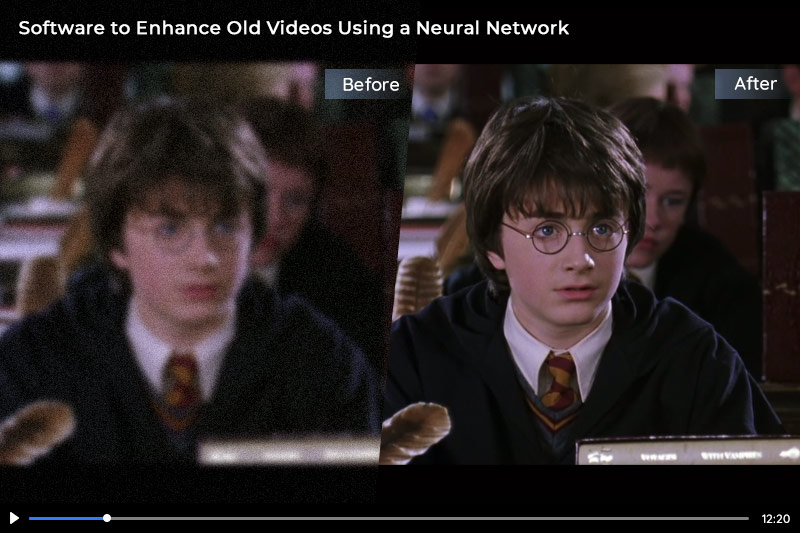
What AI cannot do: AI doesn't "recover" lost detail—it generates plausible detail based on what it's been trained on. When you enhance a grandparent's face, the AI isn't revealing what was actually there. It's predicting what a face should look like in that context. For family home movies, that's usually fine. But if you're restoring footage for historical or evidentiary purposes, keep this limitation in mind. For the longer technical read, see how neural network video enhancement works.
I've tested several AI video enhancers, and AVCLabs Video Enhancer AI stands out for VHS restoration. It has models that hold up on old, low-quality footage—not just clean modern clips. Upscaling, denoising, color, and face enhancement sit in one interface, so you can match the stack to the tape instead of bouncing between apps. The free trial is enough to run a sample of your own Christmas tape or birthday party before you spend money.
Key Features of AVCLabs Video Enhancer AI
- Upscale low-res videos to 1080p, 4K, and 8K
- Remove video noise and restore facial details
- Colorize B&W videos to bring them to life
- Blur all unwanted parts to protect privacy
- Stabilize footage by removing camera shake

A realistic target resolution: don't go straight to 4K just because you can. From a VHS source, 1080p is a huge, noticeable improvement. 1440p is a reasonable stretch. Beyond that, you're just letting the AI invent pixels that weren't there. The file size multiplies, but the real-world viewing improvement is marginal.
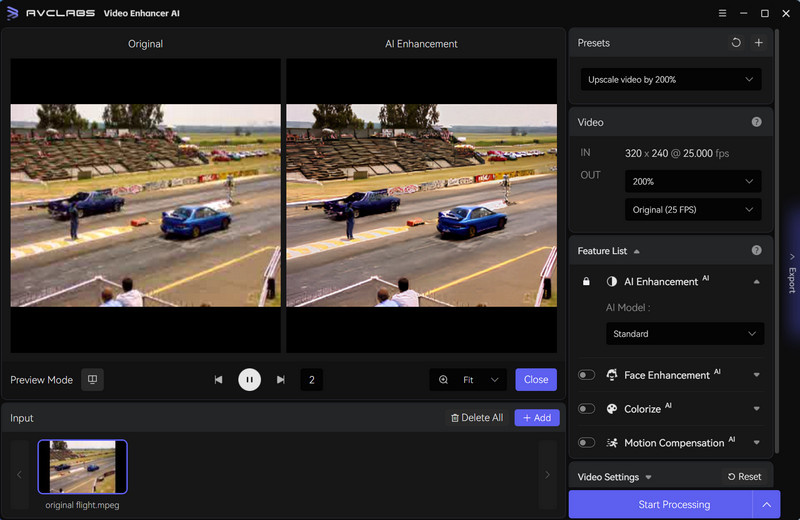
Preview a close-up and a walking shot before you run a two-hour tape. If skin goes waxy, or a logo on a T-shirt turns into a smear, turn the strength down. When the people still look like the people on the tape, that setting is enough.
Step 5. Export and Preserve Your Restored Home Movies
You've done the hard work. Now make sure it doesn't disappear.
Export two versions:
- A finished MP4 — Use H.264 or H.265 at a healthy bitrate (10–15 Mbps for 1080p). This is your viewing copy—send it to family, put it on your TV, share it online.
- Keep the original capture file — That massive lossless file from Step 2. Don't delete it. AI tools will get better over time, and you'll want to revisit your raw footage with future models.
Store in three places:
- A local hard drive (your working copy)
- An external backup drive (offline storage)
- Cloud storage (off-site protection)
Three locations, at least two different media types—that's the minimum for peace of mind.
And don't throw away the original tapes. Even after digitizing, store them in a cool, dry place. Low humidity slows mold growth. You may never play them again, but they're still the physical originals—and someday, someone in your family might want to hold them.
FAQ about Old Video Restoration
Can I clean mold off a VHS tape myself?
For light surface dust on the outside of the cassette, you can wipe it down with isopropyl alcohol. But never touch the tape itself. If there's visible mold on the magnetic ribbon, send it to a professional lab. You'll spend less than replacing a ruined VCR and losing the tape.
What resolution should I upscale VHS to?
1080p is the sweet spot. It's a massive improvement over the original, and the AI models handle it well. 4K is possible, but most of what you're seeing is AI-generated filler rather than true recovered detail. Go with 1080p unless you have a specific reason to go higher.
Do I need expensive software?
Not necessarily. AVCLabs Video Enhancer AI has a free trial so you can process a sample of your own tapes. OBS Studio is free for capture. If you're only doing a handful of tapes, the trial plus a free capture app may be all you need.
Will AI make my old videos look brand new?
No—and any tool that promises that is overselling itself. A good restoration makes your footage clear, stable, and vibrant. It won't look like it was shot yesterday, and honestly, it shouldn't. Some grain and softness are part of the character of old home movies. The goal is to preserve, not to reinvent.
How long does the whole process take?
Capture runs in real time—a two-hour tape takes two hours. AI enhancement depends on your GPU, the models you enable, and the length of the footage: a short sample can finish in minutes; a full tape can take much longer. Plan for a weekend if you're doing a batch of tapes. Take your time—these memories are worth it.
Conclusion
Restoring old VHS tapes isn't complicated, but it does require patience and a willingness to do things in the right order. Skip a step—especially the inspection—and you risk losing your footage forever. Cut corners on the capture, and you'll never get that quality back no matter how much AI you throw at it.
But when you do it right, the payoff is real. I still remember the first time I watched my restored childhood Christmas footage on a 4K TV—the colors were right, the motion was smooth, and for a moment, I was seven years old again. That's what this is about. It's not just about pixels and codecs. It's about keeping memories alive for the people who come after us.
Your tapes have been sitting in a box for decades. They've waited this long—give them the care they deserve. Take the time to do each step properly, and your family will be watching those moments for another thirty years.