How to Remove Background Noise from Video in 6 Easy Ways
 Posted By: Sherry Johnson
- Category: Video Editing Tips
- Updated On: March 4, 2026
Background noise can often be minimized during recording by selecting a quiet environment, using the right equipment and accessories, and adjusting device settings. However, even with these precautions, unwanted noise can still make its way into your recordings. So, how do you remove background noise from video after it’s been recorded? In this article, we’ll share 6 easy and practical methods on how to remove background noise from video, helping you enhance the audio quality and create a cleaner sound experience.
- How to Remove Background Noise from Video with Adobe Premiere Pro
- How to Remove Background Noise from Video through Final Cut Pro X
- How to Remove Background Noise from Video using Audacity
- How to Remove Background Noise from Video via iZotope RX
- How to Remove Background Noise from Video on iPhone
- Bonus Tip: How to Denoise Video to Remove Video Grain with AI
- FAQs about How to Remove Background Noise from Video
How to Remove Background Noise from Video with Adobe Premiere Pro
Adobe Premiere Pro is a professional video editing tool that not only offers advanced features but also provides effective solutions for cleaning up your audio. If you're dealing with distracting background noise, the "Essential Sound" panel is a quick and efficient way to enhance the clarity of your dialogue and audio. Here's a step-by-step guide to help you use the built-in tools effectively:
Step 1Import Your Video
Begin by importing the video you want to edit into Adobe Premiere Pro. Drag it to your timeline.
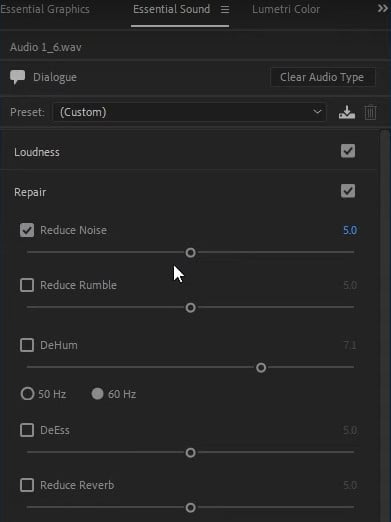
Step 2Open the "Essential Sound" Panel
Go to the top menu, click on "Window," and then select "Essential Sound" to open the panel. This will give you access to audio editing features.
Step 3Assign Audio Type
In the "Essential Sound" panel, select the audio clip in your timeline. Set the audio type to "Dialogue" for voice-related audio. Premiere Pro will automatically apply settings optimized for spoken words.
Step 4Enable "Reduce Noise"
In the "Essential Sound" panel, under the "Repair" section, you will find an option called "Reduce Noise." Check the box next to it to activate the noise reduction feature.
Step 5Adjust the Noise Reduction
Use the slider to adjust the strength of the noise reduction. A setting between 15% and 30% is typically sufficient for most background noises without compromising the audio quality.
Step 6Preview and Finalize
Once you’re satisfied with the noise reduction, preview the audio to ensure it sounds clear. If needed, make further adjustments until the background noise is sufficiently reduced.
How to Remove Background Noise from Video through Final Cut Pro X
For Final Cut Pro X users, removing unwanted background noise can be done effortlessly with its powerful audio editing capabilities. Whether you're editing a vlog, tutorial, or short film, these simple steps will help you clean up your audio and achieve a polished, professional sound.
Step 1Import Your Video
First, import the video into Final Cut Pro X and drag it onto the timeline.
Step 2Select the Audio Clip
Click on the audio portion of your video in the timeline to select it. This is where you’ll apply the noise reduction.
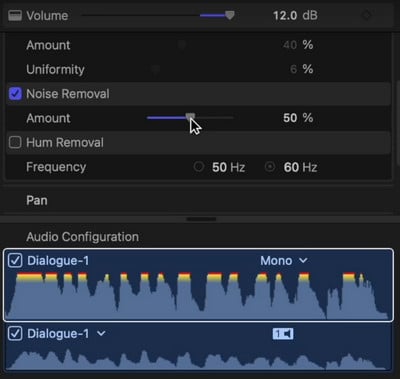
Step 3Open the "Audio Enhancements" Panel
With the audio clip selected, open the "Inspector" by clicking on the "Inspector" button in the top right. In the "Inspector," navigate to the "Audio" section to access the audio enhancements options.
Step 4Enable "Noise Removal"
Under the "Audio" section, you’ll find an option for "Noise Removal." Check the box next to it to activate noise reduction.
Step 5Adjust the "Noise Removal" Strength
Use the slider to adjust the strength of the noise reduction. Start with a low setting (around 25%) and gradually increase it until you notice a significant reduction in background noise without compromising the quality of the main audio.
Step 6Use the "Hum Removal" Option (Optional)
If you're dealing with low-frequency hums (like air conditioning or electrical noise), enable the "Hum Removal" option. Then, choose the frequency (Hz) that corresponds to the hum you want to remove. Common hums can be removed by selecting frequencies like 50 Hz or 60 Hz, depending on your location and the source of the noise.
Step 7Preview and Fine-Tune
After applying the noise removal, play back the audio to check the results. Fine-tune the settings to find the right balance between removing background noise and preserving audio clarity.
How to Remove Background Noise from Video using Audacity
Audacity is a free and powerful audio editing tool that can help you reduce background noise in your video. While Audacity is primarily an audio editor, you can easily extract audio from your video, remove noise, and then re-sync the cleaned audio with your video. Here's how to do it:
Step 1Extract the Audio from Your Video
First, you need to extract the audio from your video. You can do this using any video-to-audio conversion tool or by importing the video directly into Audacity if it supports your video format. Once the audio is extracted, open it in Audacity.
Step 2Select a Noise Sample
In Audacity, listen to the audio and find a section where only the background noise is present (no dialogue or music). Highlight a portion of this noise to use as a sample.
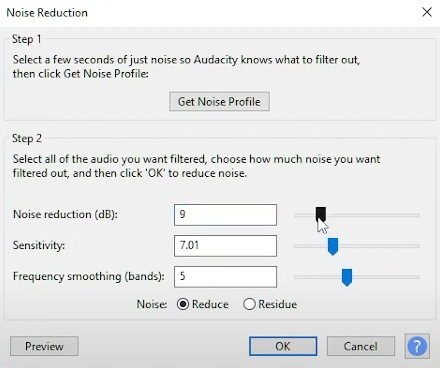
Step 3Open the Noise Reduction Tool
With the noise sample selected, go to the "Effect" menu at the top and choose "Noise Reduction." In the window that opens, click "Get Noise Profile." This allows Audacity to analyze the selected noise and identify the specific frequencies causing the unwanted sound.
Step 4Apply Noise Reduction to the Entire Audio
After getting the noise profile, select the entire audio track (click anywhere on the waveform and press "Ctrl + A" to select all). Then, return to "Effect" and select "Noise Reduction" again. This time, adjust the sliders for "Noise Reduction," "Sensitivity," and "Frequency Smoothing" to control the amount of noise reduction. A good starting point is to set "Noise Reduction" to around 12 dB, "Sensitivity" to 6.00, and "Frequency Smoothing" to 3 bands.
Step 5Preview and Adjust
Click "Preview" to listen to how the audio sounds after noise reduction. If the noise is still noticeable or if the audio quality is too degraded, adjust the sliders and preview again until you’re satisfied with the result.
Step 6Export the Cleaned Audio
Once you’re happy with the noise reduction, you can export the cleaned audio. To do this, go to the "File" menu, select "Export," and choose either "Export as WAV" or "Export as MP3" from the options.
Step 7Re-sync the Audio with the Video
After exporting the cleaned audio, you can import it back into your video editing software (like Adobe Premiere Pro, Final Cut Pro X, or iMovie). Sync the cleaned audio track with the original video, and you’re done!
How to Remove Background Noise from Video via iZotope RX
iZotope RX is a professional-grade audio repair tool, widely used for its powerful noise reduction capabilities. If you're looking to clean up your video’s audio, follow these steps to remove background noise using iZotope RX:
Step 1Import Your Audio
First, you need to extract the audio from your video. Use your preferred video editing software to separate the audio or use a tool that can directly import video and extract audio. Once you have the audio file, open it in iZotope RX.
Step 2Select the Noisy Section
Play through your audio and select a section where only the background noise is present (without any dialogue or music). This will be used as a sample for noise profiling.
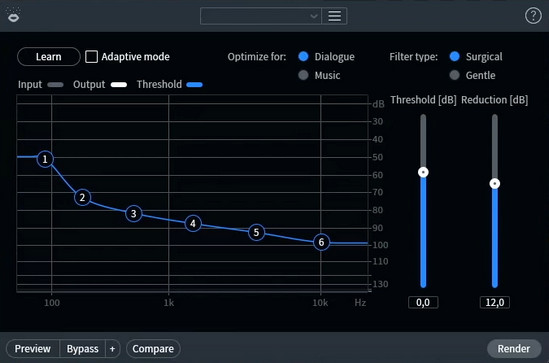
Step 3Create a Noise Profile
With the noisy section selected, go to the "Voice De-noise" module or "Spectral De-noise" module in iZotope RX. Click on "Learn" or "Capture Noise Profile" to allow RX to analyze the selected noise.
Step 4Apply Noise Reduction
After the noise profile has been captured, adjust the reduction settings. For "Voice De-noise," use the "Reduction" slider to control how much noise is removed. For "Spectral De-noise," use the sliders for "Threshold" and "Amount" to fine-tune the effect. Start with modest settings, like 6-12 dB of reduction, and adjust according to the severity of the noise.
Step 5Preview and Fine-Tune
Use the "Preview" button to listen to how the audio sounds with the noise reduction applied. If necessary, adjust the settings to avoid removing too much of the desired audio or introducing artifacts (unwanted distortion).
Step 6Use the "Spectral Repair" Tool (Optional)
If there are specific parts of the audio with more severe noise or distortion, you can use the "Spectral Repair" tool. Select the noise you want to repair, and use the tool to replace it with a more appropriate sound.
Step 7Export the Cleaned Audio
Once you’re satisfied with the noise reduction, export the cleaned audio by going to the "File" menu and selecting "Export." Choose the format you prefer (WAV or MP3), and save the file.
Step 8Re-sync the Audio with the Video
Import the cleaned audio back into your video editing software. Sync the newly cleaned audio with the original video, and you’re all set!
How to Remove Background Noise from Video on iPhone
Step-by-Step Guide: How to Remove Background Noise from Video on iPhone using iMovie
iMovie on iPhone provides basic audio editing features like separating and removing audio. However, advanced options such as noise reduction, voice enhancement, and music optimization are exclusive to the desktop version. Here's how to edit background noise on your iPhone, iPad, or Mac:
Step 1Import Your Video
Open iMovie on your iPhone or iPad and tap the "+" button to create a new project. Select your video from your media library and add it to the timeline. If you plan to use advanced tools later, ensure the video is high quality for seamless editing on the desktop version.
Step 2Separate the Audio
Tap on the video clip in the timeline to reveal editing options. Tap "Detach" to separate the audio from the video. This step allows you to edit or remove the audio independently. For advanced noise reduction, you can transfer the detached audio or video project to iMovie on your Mac.
Step 3Remove Unwanted Audio
After detaching the audio, delete or mute sections with background noise. While the mobile version doesn’t offer features like “Reduce Background Noise,” you can minimize distractions by manually muting noisy parts. On the desktop version, select the audio in the timeline, and check the “Reduce Background Noise” option in the Inspector panel. You can fine-tune the reduction percentage to your preference.
Step 4Adjust Audio Levels
To make the primary audio clearer, tap the audio clip and adjust the volume slider. Lowering the volume on noisy sections can help reduce the impact of background sounds. On the desktop, in addition to adjusting volume levels, you can use the “Enhance Voice” feature under the Audio Adjustments tab to improve clarity further.
Step 5Export the Edited Video
Once satisfied with your edits, tap "Done" to save your project. Tap the share button to export your video with the improved audio.

Step-by-Step Guide: How to Remove Background Noise from Video on iPhone using ByeNoise
ByeNoise is an AI-powered app that simplifies the process of removing background noise from videos on your iPhone. With its user-friendly interface and customizable noise reduction settings, it's perfect for beginners looking to enhance video quality with minimal effort. Here's how to use ByeNoise effectively:
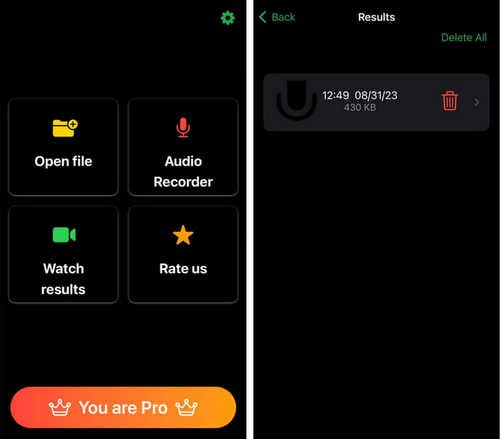
Step 1Open the ByeNoise App
Download and install ByeNoise from the App Store if you haven’t already. Launch the app on your iPhone.
Step 2Import Your Video File
Tap the “Import” button and choose the video file you want to edit from your media library.
Step 3Select AI Noise Reduction Algorithm
Choose from available AI algorithms (v0, v1, and v2). For videos with human voices, select v2 for optimal results. Adjust the noise reduction level using the slider, and enable the "Enhance Audio Quality" option below to further refine the sound.
Step 4Apply Noise Reduction
After configuring your settings, tap the “Apply” button to start the noise reduction process. The app will analyze and process the audio to reduce background noise.
Step 5Save the Edited Video
Once the noise reduction is complete, preview the results. If satisfied, tap the “Save” button to store the video on your device.
Bonus Tip: How to Denoise Video to Remove Video Grain with AI
In the previous sections, we discussed how to remove background noise from your video, improving the overall sound quality. However, noise isn’t limited to just the audio—video grain or visual noise can also detract from your video’s quality. Fortunately, AI-powered tools can also help enhance the visual aspects of your video by reducing noise and improving clarity.
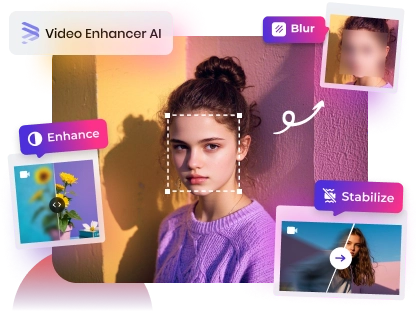
If you're looking to remove video grain and improve your footage, AVCLabs Video Enhancer AI is an excellent choice. This software uses advanced AI algorithms to denoise video while preserving fine details. It's perfect for cleaning up low-quality or grainy videos, whether they were shot in low light or have become noisy due to compression. AVCLabs Video Enhancer AI restores sharpness and remove noise, giving your videos a polished, professional look.
Key Features of AVCLabs Video Enhancer AI
- Losslessly upscale low-resolution videos to 1080p, 4K, and 8K
- Remove noise and recover and enhance facial details.
- Colorize black-and-white videos to bring them to life.
- Automatically blur unwanted video parts to protect privacy.
- Eliminate camera shake to achieve smoother video playback.
Step-by-Step Guide for Denoising Videos with AVCLabs Video Enhancer AI
Step 1Import Grainy Video
Open AVCLabs Video Enhancer AI and import the video you want to denoise. The software also supports batch processing for multiple videos.
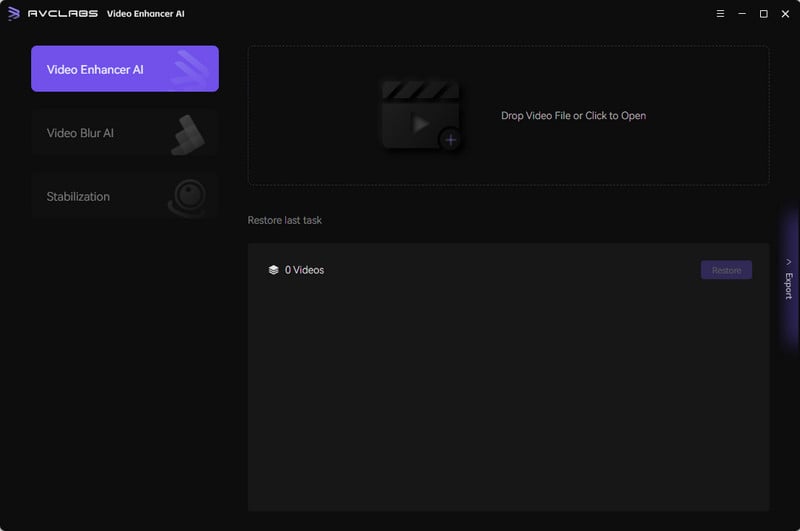
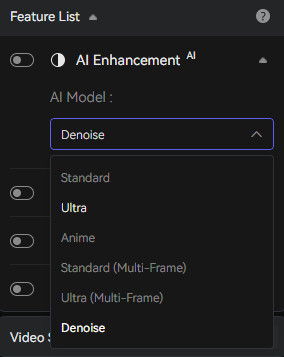
Step 2Denoise Video
In the Feature List, enable the AI Enhancement option and select the Denoise AI model.
Step 3Preview and Export Denoised Video
Click the Preview button below the video to review the denoising effect for the first 1-10 seconds. If you’re satisfied, click Export in the bottom-right corner to apply the denoising effect and export the enhanced video. Posting to TikTok? Match 1080 × 1920 and the right export bitrate so the cleaner audio and picture aren't undone by a low-quality preset.

FAQs about How to Remove Background Noise from Video
What is the free app that removes background noise from videos?
Several free apps can assist with background noise removal, such as Audacity (for audio editing) and iMovie (which offers more detailed features on Mac). These tools can help address basic noise issues effectively without requiring a paid solution. If you’re looking to denoise video and enhance its quality, AVCLabs Video Enhancer AI can remove noise and upscale your footage to 8K, with a free trial available.
How to remove background noise from speaking part of audio?
To remove background noise from the speaking part of audio, you can use tools like Adobe Premiere Pro or iZotope RX. In Adobe Premiere Pro, use the "Essential Sound" panel to apply noise reduction to the dialogue. In iZotope RX, the "Voice De-noise" tool isolates and reduces unwanted background noise while preserving the speaker's voice. Both tools provide effective noise removal without affecting the quality of the speech.