How to Make a Video with Pictures - 3 Free & Easy Ways
Pictures capture moments, but videos bring them to life. If you have a bunch of travel pictures or selfies you want to share with your family and friends, to ensure high quality, sending the original pictures not only consumes a lot of traffic but also takes up a lot of phone memory on both sides. Turning these photos into an engaging video might be more likely to whet their appetite for viewing. Creating a video from pictures is easy and fast, and there are so many tools available. This article will guide you in detail on how to make a video with pictures on different platforms.
Part 1: 3 Free & Easy Ways to Make a Video with Pictures
1. Any Video Converter - Win and Mac
Any Video Converter was originally a tool that focused on video format conversion and online video downloads, providing only the most basic video editing features, such as crop, rotate, and resize videos. However, the development team later initiated a significant update to the program. This update revamped the interface entirely and introduced additional features beyond the original basic functionalities. These newly added features include a range of audio and video editing tools, with the Merge Video tool being the main focus of this article.
The Merge Video tool lets users combine videos, images, and text into a single video. Alongside the fundamental merging capability, the program provides seven preset transitions for added visual appeal. In the following sections, we will explore how to create a video with pictures and music using Any Video Converter.

Pros:
- Comprehensive video editor and converter.
- Customized workflow.
- Free and easy to use.
Cons:
- Not convenient to preview the modifications made to the video in real time.
How to Create a Video from Pictures with Any Video Converter
Step 1: Select Merge Video Tool
Launch the program and click the Merge Video tool.
Step 2: Upload Photos and Configure Video Settings
There are three options on the upper left, click the Add Image button to upload photos. To ensure smooth transitions between each image, click on the gray icon positioned between two images. Choose a transition style and adjust its duration as needed. Next, navigate to the right side to configure the output options.
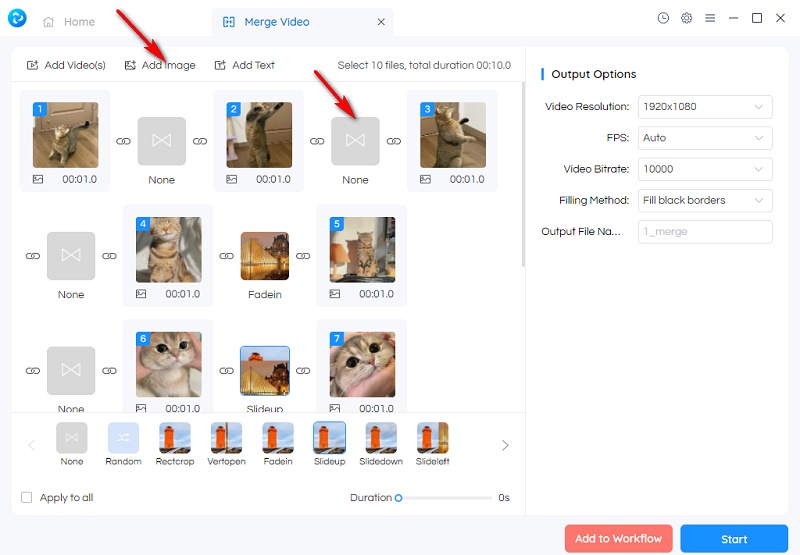
If you aim solely to merge the pictures without additional modifications, simply click the "Start" button to initiate the video processing. However, if you wish to include background music, proceed to the next step.
Step 3: Add Background Music to the Video
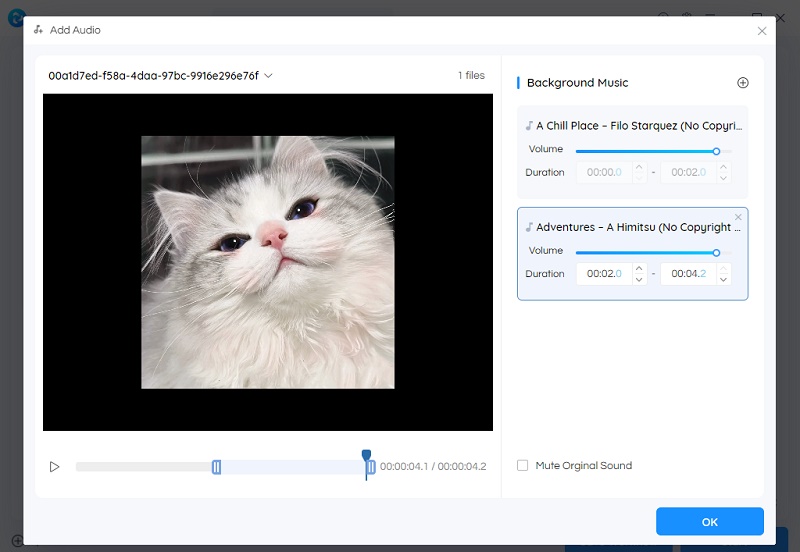
Click the Add to Workflow button. Add a new block and select the "Add Audio" tool. Connect the Merge Video and Add Audio blocks together.

Click the settings button on the Add Audio block. Then, import background music from your device and set the duration. Confirm your selections by clicking the "OK" button, and finally, hit "Start" to create the video.
2. CapCut - Win & Mac, iOS & Android
CapCut is a free, user-friendly video editing app compatible with Windows, Mac, iOS, and Android devices. Its key features include basic editing tools such as trimming, cutting, and splitting videos and options to adjust playback speed and control volume. Users can add text, stickers, filters, and effects to personalize their videos, while smooth transitions between clips and pictures contribute to a polished final product. It also supports audio editing, enabling users to import and manipulate audio files, add background music, and adjust levels for a seamless soundscape.
The best part of creating videos from photos with CapCut is that it offers rich templates. If you are a fan of TikTok, CapCut is a good choice. Users can directly apply these templates to their pictures, saving time and creating visually appealing videos easily.

Pros:
- Free to use.
- Comprehensive and advanced features such as Auto Beat.
- A vast array of transitions, effects and elements.
Cons:
- Many transitions, effects, and elements require a Pro subscription.
How to Create a Video from Pictures with CapCut
The following steps are available for both PC software and mobile app users.
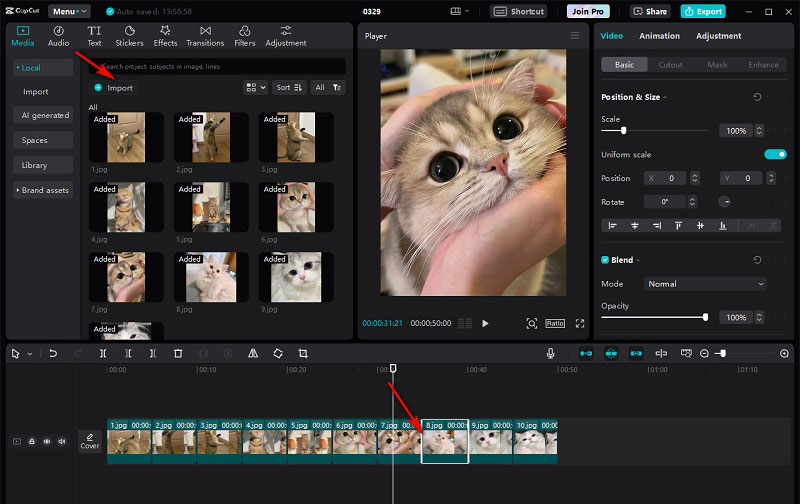
Step 1: Import Photos
Open CapCut and start a new project. Then import photos from your device's storage by tapping the "Import" button and selecting the desired pictures.
Step 2: Adjust Photo Duration and Order
Drag photos to the timeline. Tap and hold on a photo to adjust its duration by dragging the edges. You can also rearrange the order of your photos by dragging and dropping them on the timeline.
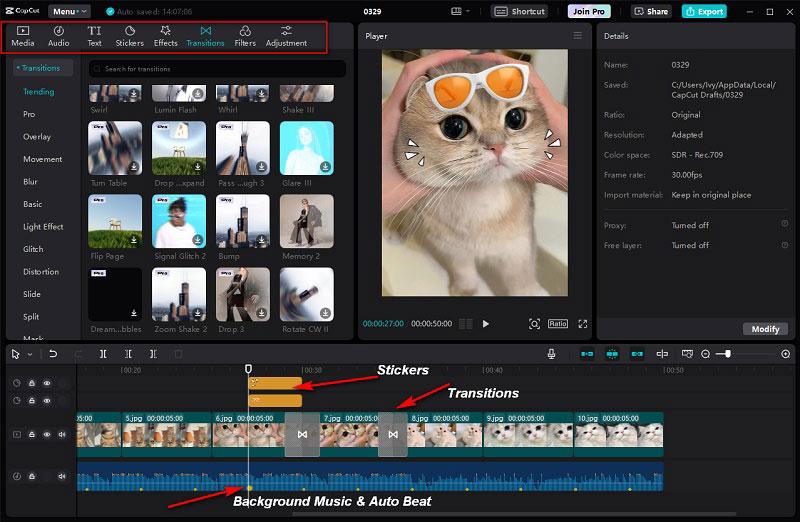
Step 3: Optimize the Video
Enhance your photos (optional): CapCut offers various editing tools to enhance your photos. Tap on a photo and explore options like filters, and text overlays, and adjust its brightness, contrast, and saturation.
Add transitions (optional): Tap on the "Transitions" tab and browse the available options. Drag and drop your chosen transition between two photos on the timeline to apply it.
Incorporate music and sound effects (optional): Tap on the "Audio" tab to add background music or sound effects. You can use music from your device's storage or CapCut's royalty-free library.
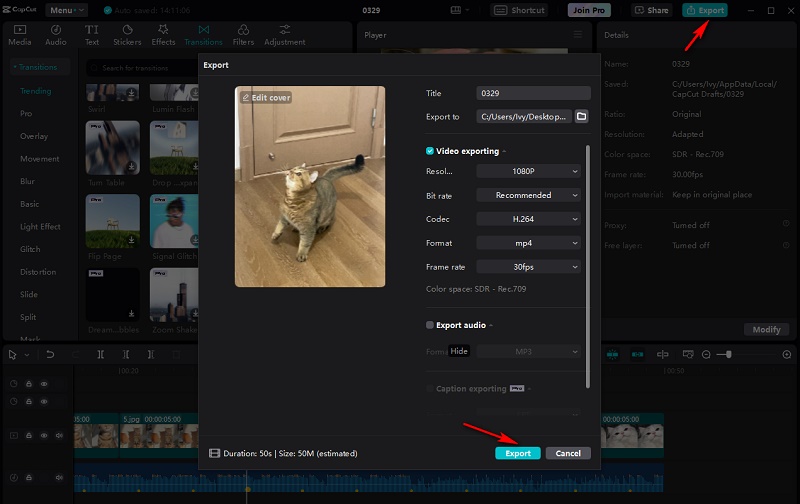
Step 4: Preview and Export
Once you're happy with your video, tap the play button to preview it. If everything looks good, click "Export" in the top right corner and choose your desired video resolution and format. CapCut will then process and export your video.
3. Canva - Online
If you don’t want to install any apps or software, there are also many online options available. For example, VEED.IO, Canva, Invideo AI, etc. Each of these tools offers a free and straightforward method for creating videos using your images, although they vary in functionality, advantages, disadvantages, and pricing. The steps for creating videos are generally similar across those platforms, as demonstrated in the tutorials for Any Video Converter and CapCut above. This article will take Canva as an example.
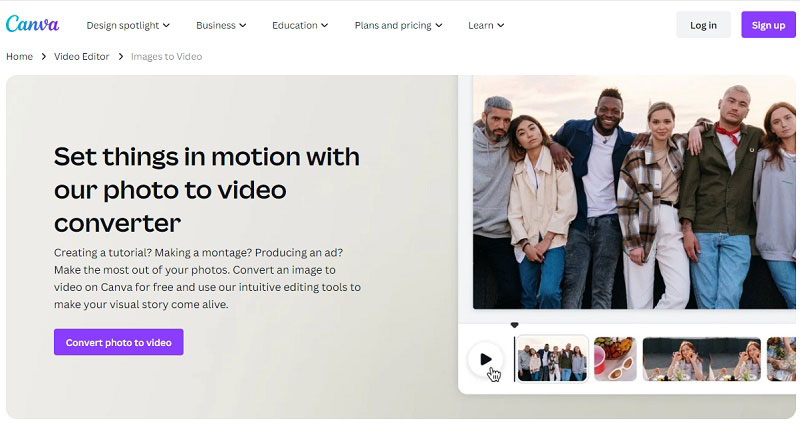
Canva is an online design platform renowned for its user-friendly interface and extensive library of design elements. It provides a variety of features suitable for diverse creative needs. Going beyond designing static images, it is also a great choice for crafting engaging videos from your pictures.
Pros:
- Free to use.
- No need to download or install anything.
- A vast array of templates and elements.
Cons:
- Some templates and elements require a Pro subscription.
- The editing functions are not as straightforward as CapCut and Any Video Converter.
How to Create a Video from Pictures with Canva
Step 1: Sign In and Create a Design
Visit the Canva website and sign in to your account. If you don't have an account, you can sign up for free. Click on the "Create a design" button located in the top right corner of the screen and select the "Video" option from the drop-down menu. Choose a video template that suits your project, or select a blank template to start from scratch.
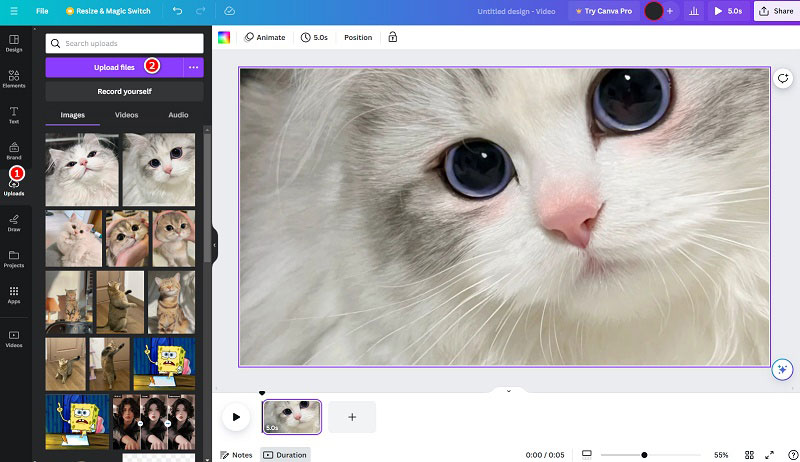
Step 2: Upload Pictures
Navigate to the "Uploads" tab on the left sidebar. Click the "Upload files" button and select the pictures you want to include in your video from your computer. Once uploaded, drag and drop the pictures onto the video template canvas.
Step 3: Customize the Video
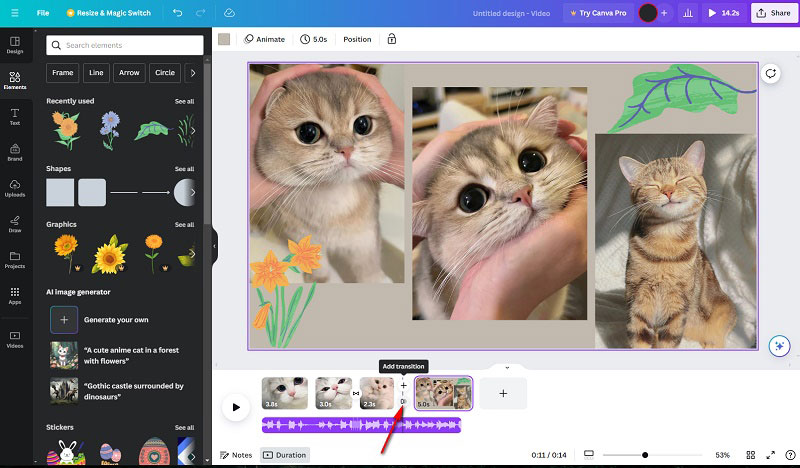
Resize and rearrange the pictures on the canvas as desired. You can also add text, and stickers, apply filters to photos, or add other elements to enhance your video. Canva offers various tools and options for customization, so feel free to experiment with different features to create the look you want.
To make your video more dynamic, add transitions between pictures and apply effects. Move the cursor between two images and click the Add Transition button.
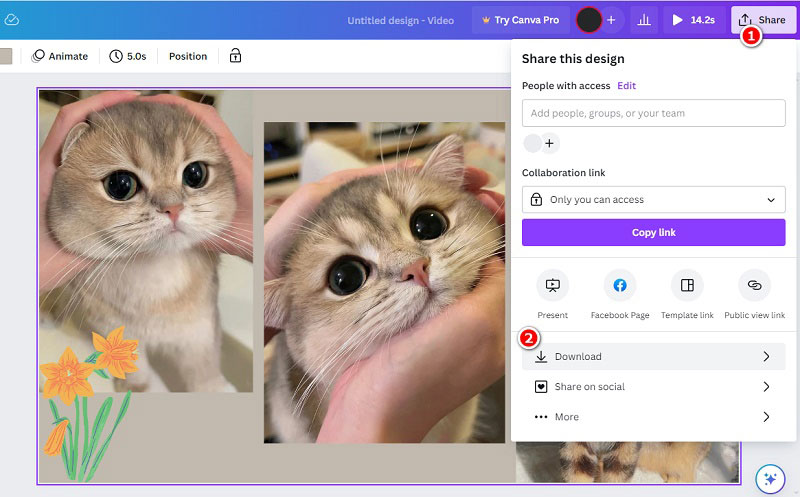
Step 4: Download the Video
Click the Share button and select the Download in MP4 format.
Part 2: Tips for Creating a Captivating Video with Pictures
1. Select High-Quality Images
Choose pictures that are clear, visually appealing, and relevant to your story. If there are unavoidable low-quality, blurry, or pixelated pictures, don’t worry, utilize the image editor to enhance them manually or employ an AI photo enhancer for automatic improvement.
2. Sync Photos to Music Beat
Select background music that complements the mood and tone of your video. Make sure to use royalty-free music or obtain the necessary permissions if you're using copyrighted material.
☞ Click to learn how to find and download copyright-free music
In addition, syncing scenes with the beat of the music adds vibrancy to your video. CapCut offers an "Auto Beat" function, which automatically places beat markers on your audio clip for smoother transitions aligned with the background rhythm.
3. Less is More
Keep your video concise to maintain viewer engagement. While transitions, text, and elements can enhance visual appeal, avoid overwhelming your video with excessive text or elaborate transitions. Aim for simplicity and elegance to deliver a compelling viewing experience.
☞ Highly Recommended: Enhance and Convert Photos to HD Quality with AI
With so much content across social media, only the highest-quality material grabs users' attention enough to halt their scrolling. Even if you're working with old or scratched photos, there are accessible solutions to enhance them quickly and efficiently.
AVCLabs PhotoPro AI offers an AI-driven approach to streamline the typically time-consuming process of photo editing. Leveraging advanced AI algorithms, it addresses the limitations of traditional editing tools, allowing users to enhance blurry or pixelated photos, upscale images to 4K resolution without loss of quality, remove scratches, colorize black-and-white photos, and erase or replace objects, all achieved with just a few clicks.
Key Features of AVCLabs PhotoPro AI
- Erase and replace objects with text prompts.
- Enhance photo quality with advanced technology.
- Change the style of image to create a unique look.
- Upscale photos up to 3x, 4x without losing quality.
- Remove unwanted objects, people, watermarks.
- Colorize B&W photos to make it come to life again.
Quick Guide on How to Convert Photos to HD Quality
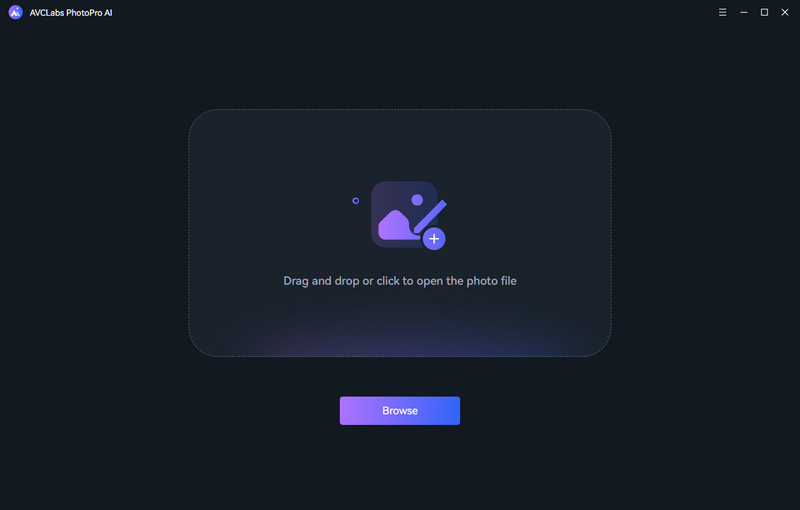
Step 1: Upload a Photo. Launch AVCLabs PhotoPro AI and click the Browse button to upload a photo.
Step 2: Select an Appropriate Model. There are 8 different AI models on the left. To convert the photo to HD quality, click the Enhance option. If the photo features a portrait, it is recommended to check face enhancement, which can effectively recover details from blurry images.
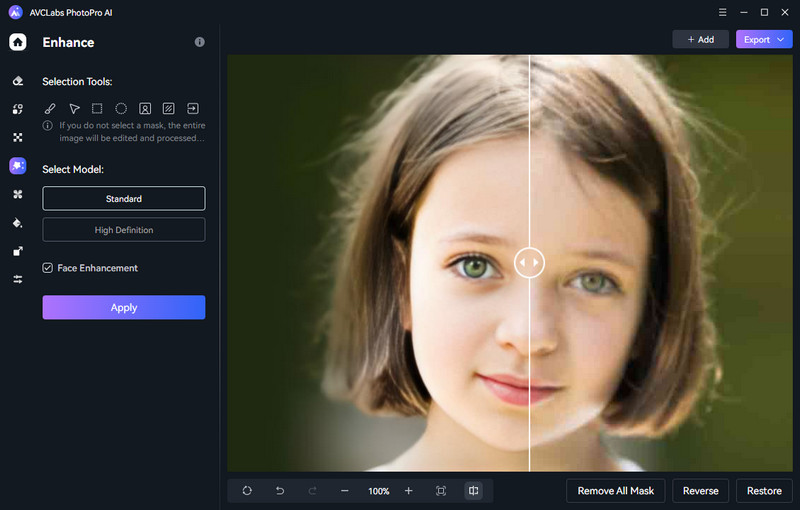
Tips: If you only need to enhance a specific part of the image, use the selection tools to isolate it first.
Step 3: Preview and Export the Enhanced Photo. Click the Apply button to process the photo. If you are satisfied with the result, hit "Export" to save the enhanced photo to your computer.
Conclusion
Creating captivating videos with pictures is easier than you might think. You can transform your photos into a dynamic and engaging visual narrative by choosing the right tool based on your needs and comfort level, following these simple steps, and incorporating a few creative touches. So, gather your favorite pictures, enhance them with AVCLabs PhotoPro AI, unleash your creativity, and get ready to share your stories in a new light!