How to Use AVCLabs Video Blur AI
How to Blur a Video using AVCLabs Video Blur AI
Follow the steps below to blur faces, any objects, background, and foreground in a video with AVCLabs Video Blur AI:
Open AVCLabs Video Blur AI
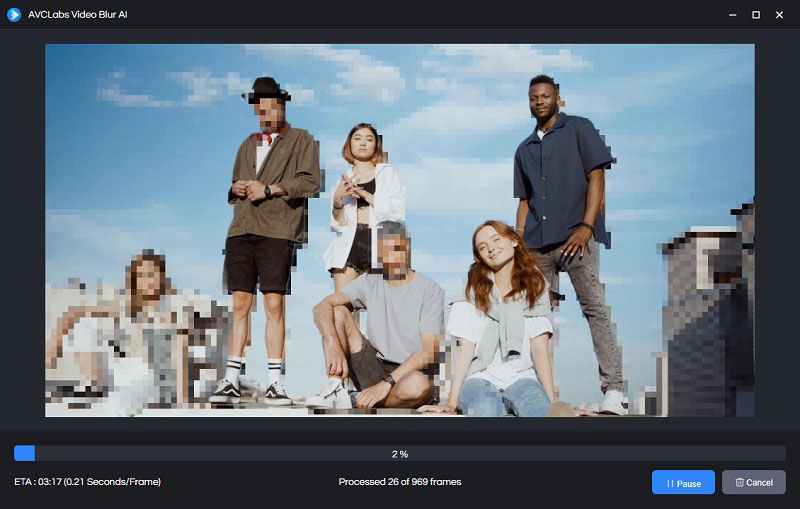
When finishing installation, launch the program, and you will enter the main window of AVCLabs Video Blur AI like the screenshot below.

Configure the Program Settings
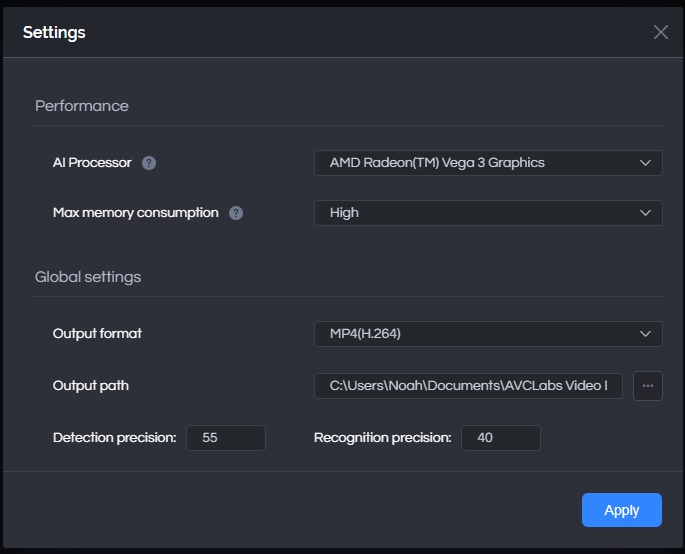
Click  and choose Settings. Here you can configure the performance and global settings.
AI Processor: Enable users to pick CPU or GPU to process the video. If users have multiple graphic cards, here users can set to use which one to process the video.
Max memory consumption: Set as high by default unless it is running with other resource-intensive programs.
Output format: Export the video to a wide array of formats.
Output path: Choose where the output file will be saved.
Detection precision: The higher the value, the fewer faces will be detected.
Recognition precision: The higher the value, the more similarities will be required for faces to be recognized as a same face.
Add Source File
There are 2 ways to add the source video to the program.
You can click the Browse button to import the video file or drag and drop the source video to the program directly.
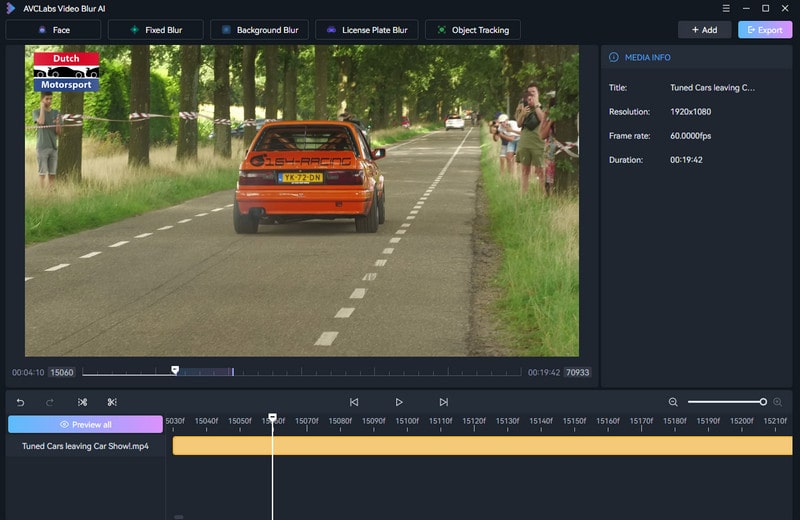
Add Blur Tasks
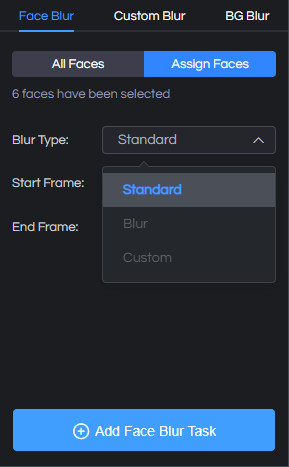
1. Face Blur
There are two options for face blur.
All Faces: Select All Faces, and the program will automatically blur every face.
Assign Faces: To blur faces selectively, select Assign Faces and scan the faces first. You can see two options for face scan:
-Quick Scan: Extract one frame from the frame interval you set for scanning. The default frame interval is 10. The larger the number of interval frames, the shorter the scan time, but the lower the accuracy.
-Frame Scan: Scan each frame with high accuracy but time-consuming.
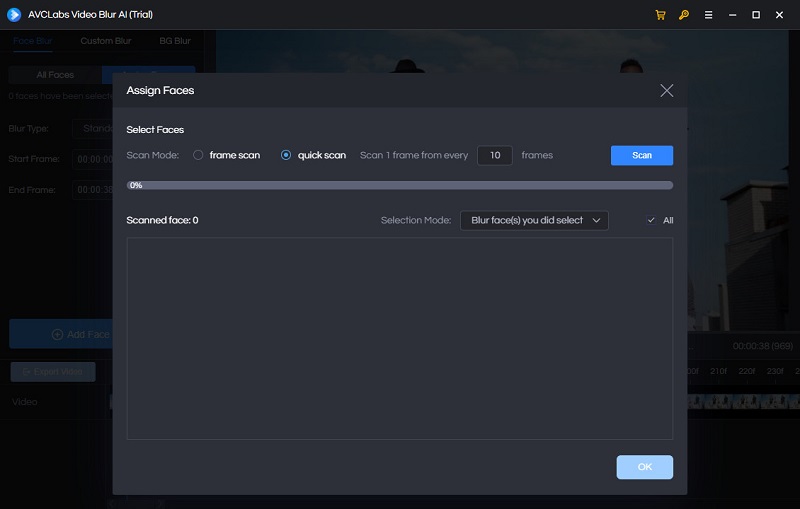
After the scan is completed, all the scanned faces will appear in the bottom panel, and you can select any face you want to blur.
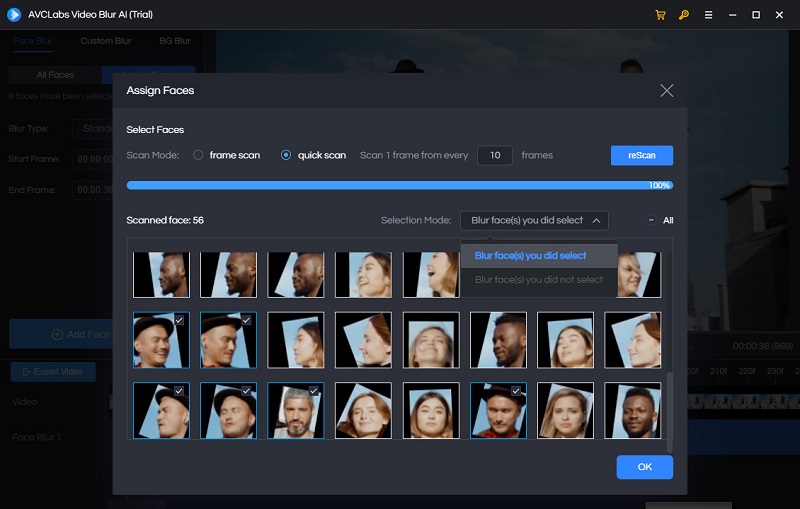
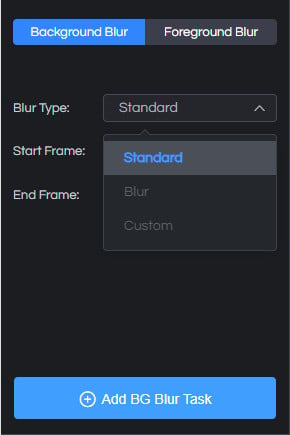
After the face to be blurred is selected, set the type of blur: Standard, Blur or Custom. Then click Add Face Blur Task.
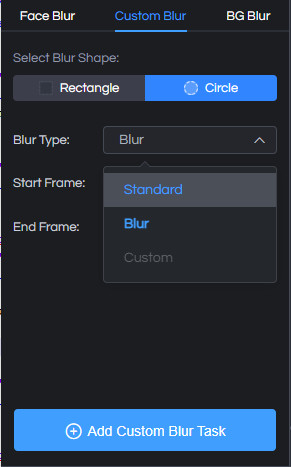
2. Custom Blur
This function allows you to arbitrarily select the area in the video that needs to be blurred. Select rectangle or circle, and the corresponding shape will appear in the video. Left-click to drag the position of the shape and resize it.
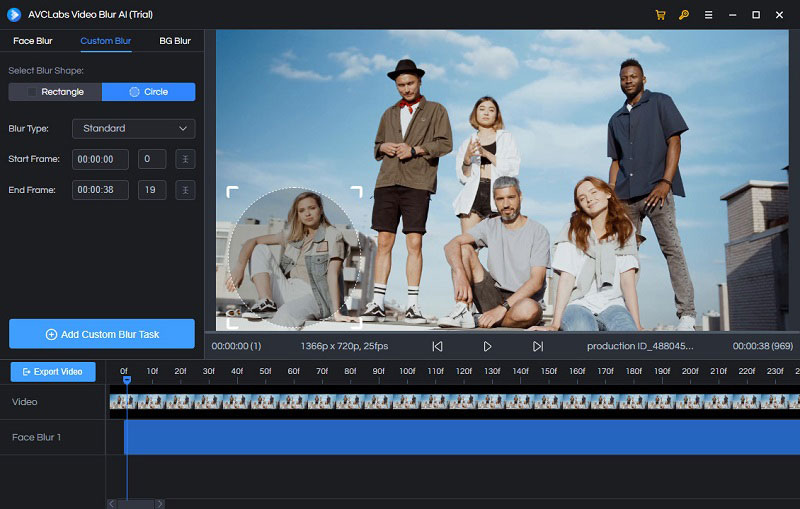
After the area to be blurred is selected, set the type of blur: Standard, Blur or Custom. Then click Add Custom Blur Task.
3. BG Blur
This function allows you to select the background or foreground in the video that needs to be blurred. Select Background Blur or Foreground Blur.
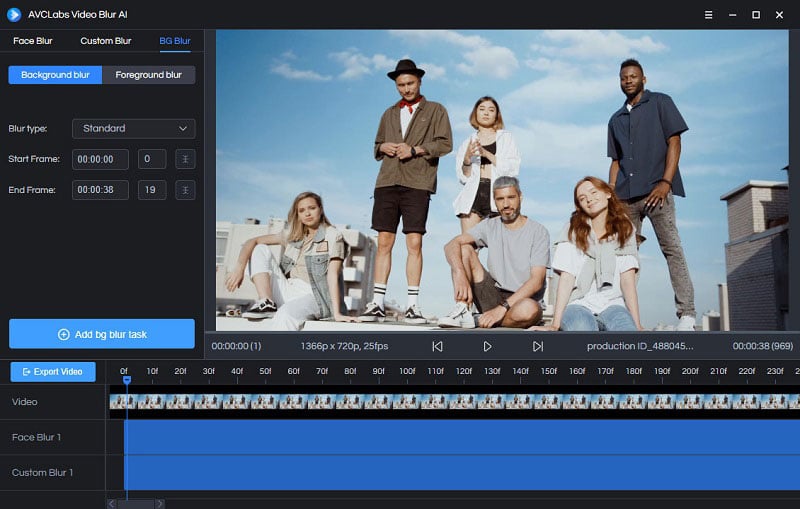
After the foreground or background to be blurred is selected, set the type of blur: Standard, Blur or Custom. Then click Add BG Blur Task.
After adding one and more blurring tasks, you can delete, edit or crop the task sequences in the timeline panel.
-Delete: Delete the blurring task from the timeline panel.
-Edit: Change the blur type, and reset the start and end frame.
-Crop: Clip the length of the blurring task.
Tips: Face blur, custom blur and BG blur can be processed simultaneously. You just need to repeat the above steps: re-select the new area to be blurred, set the blur type, and then add blur tasks.
Start to Blur Your Video
After editing the blurring tasks, click the Export Video button to process and export the blurred video. When it is finished, you can open the file folder and enjoy the final video.